I've done a moderate amount of experimenting with making resin jewelry. Quite frankly, the stuff can be quite fussy sometimes. It hates water, needs a moderate temperature, and can be a little weird about curing depending on what has been added to it. One of the other key items is that a minimum amount must be mixed in order for it to harden properly. (Read my earlier post on frequently asked questions about resin.) As I've been working on new sterling silver and resin jewelry pieces for the Downtown Festival and Art show next weekend, I've been mixing a lot of resin. I hate throwing away almost anything, including unused resin. I've been experimenting with a few different ideas, and set another experiment into motion a few days ago.
I have a silicone mold made with wells of the same size as the scrabble tile pendants. As I got done pouring yellow resin a few days ago, I covered the bottom of several of the wells with the resin I had left. It's an epoxy resin, where the two parts mix in a 2:1 ratio. The next day, I finished some scrabble tile pendants with a different, clear epoxy resin. It mixes in a 1:1 ratio. I decided to see if it would adhere and cure if I placed it on top of the other brand of resin, which had already completely cured.
I added some cute flowers with fake gems and a bit of glitter to the resin pieces. I gave it the full time to cure and wow! It worked!! I haven't decided what to do with these yet. Maybe pendants, maybe a group of them for bracelet links. Not sure yet, but I'll post a picture when I figure it out.
Pages
▼
Friday, October 29, 2010
Wednesday, October 27, 2010
Jewelry making mistakes
I don't think it's completely fair to put up all the pictures of my jewelry without showing you that I'm not perfect. Two lessons that reared their ugly head this week:
You can't be too stingy with the glue when you're sealing your artwork. This pendant was from a batch of scrabble tile pendants for Christmas. I was running low on glue sealant and didn't go over the back of the papers as thick as I normally do. I figured since I was gluing them to the scrabble tiles, it would be okay. As you can see, the results were a disaster! About half of that batch of pendants have "water marks" and can't be used.
I also found out that I can't look for bubbles too often. Once I pour resin over the tiles, I go back over them and look for bubbles to remove. (I use a combination of a heat gun and toothpick to get them out.) Aargh! I missed one on this pendant. It's also headed to the scrap pile.
Overall, I feel good when everything goes well, but hate when I get to the end and don't have a salable piece of jewelry.
Monday, October 25, 2010
Resin jewelry making pictures
My sterling silver and resin jewelry has been a bit neglected for the past couple of months. The scrabble tile pendants have taken off with orders, and I have been mostly focusing on them as of late. That is changing a bit as we move closer to the holiday shopping season. These are just some random pictures from this weekend of resin and silver pendants in progress.
The resin gets poured in stages. I only pour one color at a time.
The silver portion of the pendants get "staged" first. Then I pour the colors.
Can you tell that red and green were my last two pours? The resin needs at least 24 hours to cure before I pour the next color.
I "overfill" the resin in the silver well. This will get sanded down later.
When I'm done pouring the resin, I let the jewelry set in a glass pyrex dish covered with plastic wrap. I will check on it from time to time and make sure nothing is going wrong. For example, a couple of hours after I poured the green resin, one of the pendants was leaking from underneath. I was able to get it out and clean up the resin before it made a huge mess on a several pendants.
I hope to have many of these pieces ready for the Downtown Festival and Art Show in November.
Friday, October 22, 2010
New resin jewelry storage containers
Whether it's because I'm frugal or resourceful, I'm a big believer in "use it up or wear it out". I don't just buy the latest "it product" because I want it and I try to repurpose as many things as possible. As I've found out though, sometimes I have to "start over."
I've been using recycled storage containers (baby wipes, large yogurt tubs, etc.) to store the new scrabble tile jewelry pieces. As I found with my last art show, it made it difficult to look for a specific piece to accommodate a customer request and/or set out a similar replacement piece for display. I decided to "splurge" and get some "user friendly" storage pieces.
I bought several wooden trays (shown on right of the picture) and plastic inserts (left side of the picture) with individual storage bays.
The plastic pieces fit snugly inside the wooden trays. I can put up to four resin scrabble tile pieces in each bay. I group them according to theme.
I can then stack the trays on top of each other.
I also purchased a canvas tote bag to store the stacked containers. The side zips down and I can just slide them in.
Here we go! All zipped up and ready to head to the Downtown Festival and Art Show in a couple of weeks. I'm pretty excited that this will make things easier for me to store and organize my resin jewelry pieces.
Wednesday, October 20, 2010
Jewelry making class - forged copper metal earrings
My next class at Gifts of Avalon, Gainesville, Florida, is Monday, November 15 at 6 PM. This is another brand new class, and I will be teaching students how to make copper earrings using metal forging techniques.
No experience is required, but of course is always helpful. Students will learn to make earrings, like the ones shown here, in about two hours. Anyone interested should contact Gifts of Avalon to register.
Monday, October 18, 2010
Noche de Gala silent auction donation
I get many requests during the year for me to donate my jewelry for the benefit of charity. While these charities are very worthwhile, I have to say no to many requests simply because I cannot afford to give away that much jewelry. I do, however, have several charities I feel strongly about, and I make a point to support them with their endeavors.
One such charity is the Sebastian Ferrero Foundation. This foundation was founded by Sebastian's parents after he died of a medication overdose at the young age of three. His parents have turned their tragedy into a quest to have a children's hospital in Gainesville, Florida. I am completely amazed by their resolve into making their son's death a chance to improve medical options for children in the north Florida area. As a parent of a son who has required intensive pediatric care, including three surgeries, I feel very strongly about supporting their endeavor.
This coming Saturday evening is their annual event and fundraiser, Noche de Gala. I have donated one of my coral bracelets (shown left) to their silent auction. The bracelet normally retails for $250. Many other artists and businesses from this area have donated items as well. Pre event bids are open for all the items. Even if you're not local, you can still find many pieces of beautiful artwork to buy knowing that the proceeds will go to help many children. My hope is that once again, they will have a successful evening that will bring them even closer to seeing their son's memory impact thousands of children.
One such charity is the Sebastian Ferrero Foundation. This foundation was founded by Sebastian's parents after he died of a medication overdose at the young age of three. His parents have turned their tragedy into a quest to have a children's hospital in Gainesville, Florida. I am completely amazed by their resolve into making their son's death a chance to improve medical options for children in the north Florida area. As a parent of a son who has required intensive pediatric care, including three surgeries, I feel very strongly about supporting their endeavor.
Color enhanced coral, sterling silver, bronze, green aventurine |
This coming Saturday evening is their annual event and fundraiser, Noche de Gala. I have donated one of my coral bracelets (shown left) to their silent auction. The bracelet normally retails for $250. Many other artists and businesses from this area have donated items as well. Pre event bids are open for all the items. Even if you're not local, you can still find many pieces of beautiful artwork to buy knowing that the proceeds will go to help many children. My hope is that once again, they will have a successful evening that will bring them even closer to seeing their son's memory impact thousands of children.
An nice, inexpensive red wine
I haven't blogged about wine recently mostly because I haven't been enjoying much of it. I have been focused on getting jewelry ready for the Downtown Festival and Art Show and have found that drinking a glass of wine (or two) in the evening has sometimes kept me from focusing on the task at hand. (*wink*)
However, on the advice of a friend, I recently bought a bottle of the Columbia Crest 2008 Two Vines Merlot. This is a very nice, quality red wine. It was less than $8 a bottle, so I don't feel at all bad about opening it up just for myself. There is a bit of cherry and plum in this light to medium bodied red wine. I would say the wine is a bit young, as I needed to let it breathe for a good 30 minutes for the full bouquet to come through. I would certainly recommend having a few bottles of this on hand for when unexpected company drops by.
Friday, October 15, 2010
Essential equipment for my jewelry making business
As I'm in my art studio the other day, I was looking around at the jewelry making equipment I have that isn't technically jewelry making equipment. I say that because they are not items you would find in any of my jewelry supply catalogs, but I absolutely find them essential to my business.
These are my top 5 items, that if they went away, I would seriously miss:
1. Sharpies These are great to use to write on metal. I also use them to mark storage bags and storage containers. I have them in almost every color possible. Yes, I love my Sharpies. (My jewelry making class participants also hear me sing my praises for Sharpies a lot.)
2. Bembo mini trekker tripod. This is the tripod I set my camera up on to take pictures. It is a "mini" tripod, approximately 24 inches high, that allows me to get super close to get great detail on my jewelry. It is almost like "Gumby" in that I can contort it into almost angle or height possible. Once I get my camera set up and the jewelry positioned, I set a timer on the camera to take the picture. I wouldn't be able to get clear pictures otherwise since my shaky hands make blurry pictures.
3. The internet This might sound very cliche, but the internet has opened a lot of doors for me. I have made sales to people I would not have ordinarily met living here in Florida. I also have been fortunate to have met others in the art business that have been invaluable in guiding me in my jewelry making career .
4. Endicia This is an internet based postage company that allows me to purchase postage online and print directly to labels on my printer. This allows me to weigh my packages in my studio, enter that information into the program, and print out the shipping label with the appropriate postage. I can then hand the packages to hubby as he's heading out the door to drop in a blue mailbox. Standing in line at the post office happens no more!
5. Templates and rulers While you might think, what's the big deal about these, I have a very special collection of office supplies. I have certain rulers with specific marks (and the same goes for my templates). I also have a collection of templates used by architecture gurus that allow me to make precise sketches and/or drawings on metal (using Sharpies of course). The right piece of equipment definitely makes things more efficient.
What do you have in your office that is just "must have" for what you do?
These are my top 5 items, that if they went away, I would seriously miss:
Assorted colors of fine point Sharpies |
1. Sharpies These are great to use to write on metal. I also use them to mark storage bags and storage containers. I have them in almost every color possible. Yes, I love my Sharpies. (My jewelry making class participants also hear me sing my praises for Sharpies a lot.)
Bembo mini trekker tripod |
2. Bembo mini trekker tripod. This is the tripod I set my camera up on to take pictures. It is a "mini" tripod, approximately 24 inches high, that allows me to get super close to get great detail on my jewelry. It is almost like "Gumby" in that I can contort it into almost angle or height possible. Once I get my camera set up and the jewelry positioned, I set a timer on the camera to take the picture. I wouldn't be able to get clear pictures otherwise since my shaky hands make blurry pictures.
The high speed internet router in my office |
3. The internet This might sound very cliche, but the internet has opened a lot of doors for me. I have made sales to people I would not have ordinarily met living here in Florida. I also have been fortunate to have met others in the art business that have been invaluable in guiding me in my jewelry making career .
DYMO label writer for printing postage |
4. Endicia This is an internet based postage company that allows me to purchase postage online and print directly to labels on my printer. This allows me to weigh my packages in my studio, enter that information into the program, and print out the shipping label with the appropriate postage. I can then hand the packages to hubby as he's heading out the door to drop in a blue mailbox. Standing in line at the post office happens no more!
Assorted templates and ruler on my soldering bench |
5. Templates and rulers While you might think, what's the big deal about these, I have a very special collection of office supplies. I have certain rulers with specific marks (and the same goes for my templates). I also have a collection of templates used by architecture gurus that allow me to make precise sketches and/or drawings on metal (using Sharpies of course). The right piece of equipment definitely makes things more efficient.
What do you have in your office that is just "must have" for what you do?
Wednesday, October 13, 2010
My visit to McIntyre Stained Glass Studio and Art Gallery.
One of the art galleries that sells my jewelry locally is McIntyre Stained Glass Studio and Art Gallery. I have known artists and owners Mike and Mary McIntyre for several years. They are very talented in of themselves and are great to work with from an artist's standpoint. I dropped off some new jewelry the other day and thought I would take a few pictures while I was there to share with blog readers.
Their space is divided into two areas. The back half of the store is their studio space. This is where they cut and assemble their stained glass pieces.
I am always impressed with how organized and clean their studio space is. Their glass pieces are always organized and they have everything within easy reach.
I have never taken a stained glass making class, but can appreciate the work that goes into creating a piece. This is one of their commissions in progress.
The front half of the store is the gallery space. They pride themselves with only displaying and selling art from local artists.
My youngest son happened to be with me as I was making my jewelry delivery. Much to my amazement, he was not interested at all in touching anything. Phew!
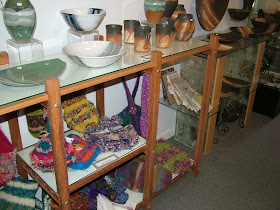
While it's a small store space, everything is displayed very tastefully. Shoppers should not have the feeling of being overwhelmed with all the art.
These are some of my new scrabble tile resin pendants in their display case.
I try to have a varied jewelry assortment there so patrons looking for a unique jewelry gift can have a variety to pick from.
Of course they have their own finished stained glass pieces as well. They also have an assortment of sizes and styles of stained glass available.
Their shop is open six days a week and other times by appointment. They are also a regular participant of the Uptown Art Hop.
For anyone interested in stained glass making classes, they do teach from their studio. I don't know the specifics, but Mike and Mary will be happy to help you get registered.
Monday, October 11, 2010
Visiting the Santa Fe College teaching zoo
So now that the weather in Florida has finally cooled off enough that it's bearable to be outside, I have been looking for activities to do with my boys outside. It had been awhile since we had been to the Santa Fe College teaching zoo, so I decided to take them over for a tour.
First of all, while it's a zoo, it's not a zoo in the traditional sense. It's a place for Santa Fe College students to learn zoo keeper skills. You don't go walk through it like you might other zoos. Instead, you go with a tour guide, who is one of the students. The zoo really isn't set up with walkways and such to allow people to just go willy nilly wherever they want.
The zoo has a nice collection of small animals: monkeys, birds, snakes, alligators, bald eagles, waterfowl. There are also some rheas, llamas and a few deer. The tour lasts about 1 1/4 hours, which was just right for a few boys all under the age of four. A word of caution though for moms, it's also not a stroller friendly zoo. If you're not prepared to walk, I would tell you not to go, or in my case, be prepared to carry somebody.
The admission is very reasonable and my boys were asking to go back. Certainly a welcome outdoor activity now that fall has finally arrived in Florida. If you think you might want to go, there is a list of Santa Fe College Zoo frequently asked questions that should give you the answers you need.
Squirrel monkey |
Galapogos tortoise enjoying his lunch of leaves |
The zoo has a nice collection of small animals: monkeys, birds, snakes, alligators, bald eagles, waterfowl. There are also some rheas, llamas and a few deer. The tour lasts about 1 1/4 hours, which was just right for a few boys all under the age of four. A word of caution though for moms, it's also not a stroller friendly zoo. If you're not prepared to walk, I would tell you not to go, or in my case, be prepared to carry somebody.
The admission is very reasonable and my boys were asking to go back. Certainly a welcome outdoor activity now that fall has finally arrived in Florida. If you think you might want to go, there is a list of Santa Fe College Zoo frequently asked questions that should give you the answers you need.
Friday, October 08, 2010
How to Make Jewels, Gems, Crystals, and Pendants
I found this easy to follow video on how to use resin to make your own gemstones and such. While I don't use this exact technique, viewers of the video can appreciate some of the ways jewelry makers can use resin to make jewelry.
Wednesday, October 06, 2010
Corrugated metal earrings - jewelry making class pictures
I taught another class this past Monday evening on how to make corrugated metal earrings. Five of the six students had taken a class from me before, so it was fun for me to get a chance to catch up with everyone.
Students for this class got to make two different pair of earrings: one with sheet metal and one with wire.
(These are student Kathy's collection of future earrings from class.)
Everyone had some kind of metalsmithing and jewelry making experience, which helped to allow students to get both pairs made in the two hour class.
We had fun chatting it up too. It was a great energy in the class.
A little concentration doesn't hurt either.
The general consensus was that making earrings this way is a lot of fun. Almost everyone purchased extra metal to make a few extra earring pairs for friends and family.
These are just a few of the finished projects everyone completed in about two hours.
Chris made these earrings; a pair for her and a pair for her daughter.
These are Jill's wire earrings. She couldn't decide on the beads, so she made one of each.
Claudia also made a pair of each. She admitted she was going to have to do this again. *smile*
A close up of Claudia's wire earrings with the beautiful denim lapis beads.
Cheryl made her wire earrings with brown goldstone.
Cheryl's corrugated sheet earrings were also the "guinea pigs" for the tumbler.
Linda decided she would rather have pendants than earrings. Her four designs are shown here.
I don't know when I will be teaching this class again, but I know I will also be teaching an "intermediate" level metal corrugation and crimping class sometime in the near future. Check my class schedule to get the latest.
Monday, October 04, 2010
Resin jewelry and art festivals
So I completely should be fired. I promised on Friday's post that I would take pictures of my booth as I was getting it together for the Thornebrook Art Festival. I was almost done when I realized, OOPS! I hadn't taken a single picture. I had a few minutes Saturday morning after getting the jewelry in the case to get some pictures.
Thornebrook is the only outdoor show I do where I don't use a tent. I'm under an awning next to one of the stores in the complex. I display my work under glass, mostly because, I hate to say it, it tends to get stolen if I don't. I place the jewelry on display pieces. I use scrap granite tiles and travertine stone to help give the display some lift and visual interest. I also have signs up briefly explaining the procedures and prices.
This time of year is my one and only advertised sale. I prepackaged all my sale jewelry this year and had it in two baskets. A lot of my shoppers said they were getting their holiday shopping done early. I was only left with a handful of pieces.
This was the first time I had the scrabble tile pendants in public, and they were a hit! The biggest sellers were the Halloween themed pendants (seen in the lower right corner of this picture. I will have the Halloween jewelry up until October 31. Click here if you would like to purchase a piece of Halloween jewelry.
Thanks to all who came out to see me at the festival. See you next month at the Downtown Festival and Art show!
Thornebrook is the only outdoor show I do where I don't use a tent. I'm under an awning next to one of the stores in the complex. I display my work under glass, mostly because, I hate to say it, it tends to get stolen if I don't. I place the jewelry on display pieces. I use scrap granite tiles and travertine stone to help give the display some lift and visual interest. I also have signs up briefly explaining the procedures and prices.
This time of year is my one and only advertised sale. I prepackaged all my sale jewelry this year and had it in two baskets. A lot of my shoppers said they were getting their holiday shopping done early. I was only left with a handful of pieces.
This was the first time I had the scrabble tile pendants in public, and they were a hit! The biggest sellers were the Halloween themed pendants (seen in the lower right corner of this picture. I will have the Halloween jewelry up until October 31. Click here if you would like to purchase a piece of Halloween jewelry.
Thanks to all who came out to see me at the festival. See you next month at the Downtown Festival and Art show!