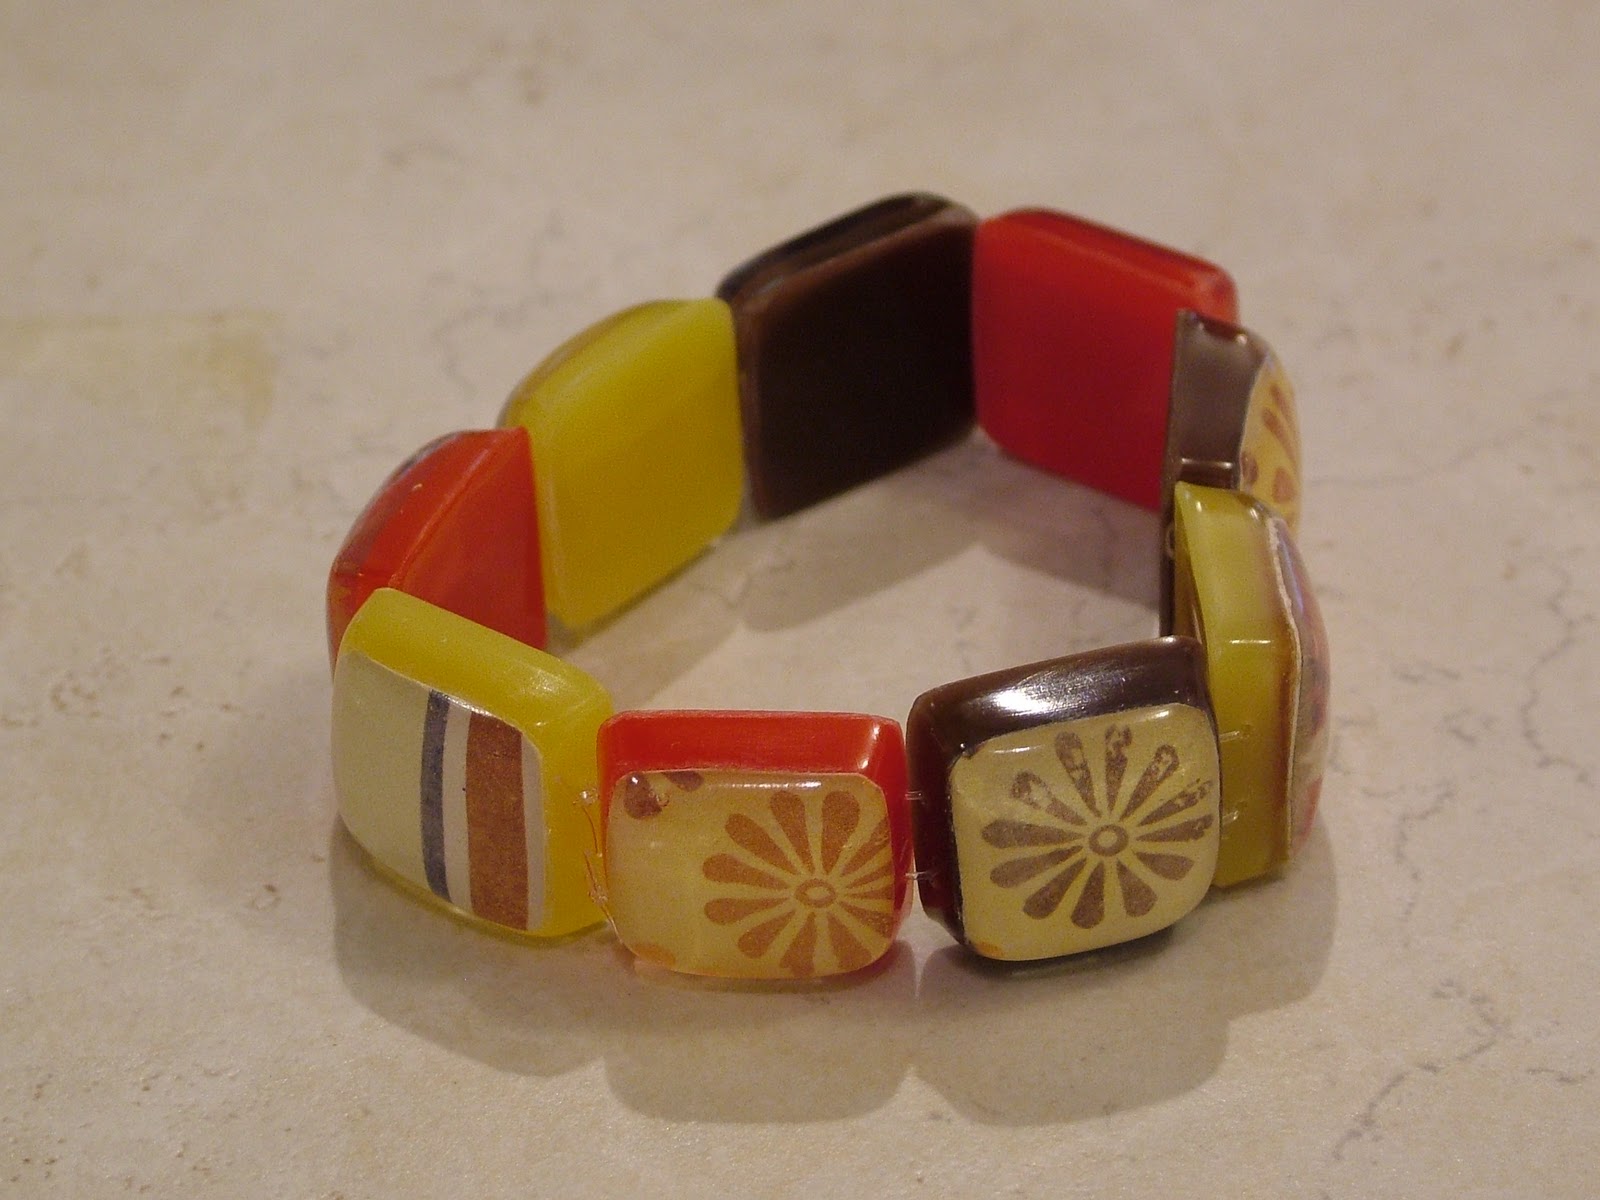
Showing posts with label art jewelry. Show all posts

Wednesday, August 03, 2011

The weird adventures of resin jewelry making

Share |
Resin can be a fussy beast. I thought I had experienced every weird thing that could happen with resin, until I saw this.


I poured a batch of resin, which covers about 30 or so pendants.  After the 3 days curing time, I went to take them off the curing tray and noticed this one looked "sticky" around the edges.  I touched the top, and it slid off the tile.


The resin had "cured", but didn't stick to the image on the scrabble tile.  Don't ask me why; this was the only one that did it.  Lump that one into the bizarre adventures in resin jewelry making.

Tuesday, July 05, 2011

Your invitation to a jewelry open house in Gainesville, Florida

Share |
Linda BlondheimJoin me at the loft studio of Florida landscape acrylic painter Linda Blondheim for a HEN PARTY.  Her studio is upstairs at Paddiwhack, 4128 NW 16th Blvd., Gainesville - next to Fresh Market.  (Just walk to the back of the store and look for the neon sign.)  The event is on Saturday, August 6, and runs from noon to 4 PM.  I will be there beginning at  1 PM and will have my scrabble tile jewelry, along with my new resin and pewter jewelry.  I'll be there to answer questions, demonstrate  some jewelry techniques, and maybe pick up paint brush -- only to look at.  I will have small resin jewelry gifts for attendees (until they run out), so get there early!  Other artisans will be there sharing their handmade soaps, washcloths and handbags. 

Did I mention there would be music by guitarist Bob Brounley from 1 to 3 PM along with light snacks? 

RSVP's appreciated, but not required.  (By the way, the guys can come too.)

Monday, July 04, 2011

Jewelry making on the 4th of July

Share |
Even though today is a holiday, I've been making more resin jewelry.  Why?  Because I took a few days off last week, full well knowing that I was going to have to make up for it when I got back.  I have two new accounts in Texas that have placed orders for my scrabble tile jewelry pendants.  Here's a preview of the "bohemian hearts" pattern assortment that they chose:


This pattern is a little different from what I've done previously in that they will have a horizontal orientation.


What I really like about the pattern is that it's not the "cutesy" pink and purple hearts.  It's more artistic and easily wearable throughout the year.

Friday, October 29, 2010

Resin jewelry making experiment

Share |
I've done a moderate amount of experimenting with making resin jewelry.  Quite frankly, the stuff can be quite fussy sometimes.  It hates water, needs a moderate temperature, and can be a little weird about curing depending on what has been added to it.  One of the other key items is that a minimum amount must be mixed in order for it to harden properly.  (Read my earlier post on frequently asked questions about resin.)  As I've been working on new sterling silver and resin jewelry pieces for the Downtown Festival and Art show next weekend, I've been mixing a lot of resin.  I hate throwing away almost anything, including unused resin.  I've been experimenting with a few different ideas, and set another experiment into motion a few days ago.


I have a silicone mold made with wells of the same size as the scrabble tile pendants.  As I got done pouring yellow resin a few days ago, I covered the bottom of several of the wells with the resin I had left.  It's an epoxy resin, where the two parts mix in a 2:1 ratio.  The next day, I finished some scrabble tile pendants with a different, clear epoxy resin.  It mixes in a 1:1 ratio.  I decided to see if it would adhere and cure if I placed it on top of the other brand of resin, which had already completely cured.


I added some cute flowers with fake gems and a bit of glitter to the resin pieces.  I gave it the full time to cure and wow!  It worked!!  I haven't decided what to do with these yet.  Maybe pendants, maybe a group of them for bracelet links.  Not sure yet, but I'll post a picture when I figure it out.

Friday, October 22, 2010

New resin jewelry storage containers

Share |
Whether it's because I'm frugal or resourceful, I'm a big believer in "use it up or wear it out".  I don't just buy the latest "it product" because I want it and I try to repurpose as many things as possible.  As I've found out though, sometimes I have to "start over."

I've been using recycled storage containers (baby wipes, large yogurt tubs, etc.) to store the new scrabble tile jewelry pieces.  As I found with my last art show, it made it difficult to look for a specific piece to accommodate a customer request and/or set out a similar replacement piece for display.  I decided to "splurge" and get some "user friendly" storage pieces.

I bought several wooden trays (shown on right of the picture) and plastic inserts (left side of the picture) with individual  storage bays.


The plastic pieces fit snugly inside the wooden trays.  I can put up to four resin scrabble tile pieces in each bay.  I group them according to theme.


I can then stack the trays on top of each other.


I also purchased a canvas tote bag to store the stacked containers.  The side zips down and I can just slide them in.


Here we go!  All zipped up and ready to head to the Downtown Festival and Art Show in a couple of weeks.  I'm pretty excited that this will make things easier for me to store and organize my resin jewelry pieces.


Monday, October 04, 2010

Resin jewelry and art festivals

Share |
So I completely should be fired.  I promised on Friday's post that I would take pictures of my booth as I was getting it together for the Thornebrook Art Festival.  I was almost done when I realized, OOPS!  I hadn't taken a single picture.  I had a few minutes Saturday morning after getting the jewelry in the case to get some pictures.


Thornebrook is the only outdoor show I do where I don't use a tent.  I'm under an awning next to one of the stores in the complex.  I display my work under glass, mostly because, I hate to say it, it tends to get stolen if I don't.  I place the jewelry on display pieces.  I use scrap granite tiles and travertine stone to help give the display some lift and visual interest.  I also have signs up briefly explaining the procedures and prices.


This time of year is my one and only advertised sale.  I prepackaged all my sale jewelry this year and had it in two baskets.  A lot of my shoppers said they were getting their holiday shopping done early.  I was only left with a handful of pieces.


This was the first time I had the scrabble tile pendants in public, and they were a hit!  The biggest sellers were the Halloween themed pendants (seen in the lower right corner of this picture.  I will have the Halloween jewelry up until October 31.  Click here if you would like to purchase a piece of Halloween jewelry.


Thanks to all who came out to see me at the festival.  See you next month at the Downtown Festival and Art show!

Friday, September 10, 2010

How I got started making resin jewelry

Share |
For anyone that has followed my art jewelry and jewelry making career for any period of time knows that I haven't always made resin jewelry.  My career started in 2001 when I finally had the chance to explore my jewelry making skills.  I took a class with local jewelry artist Susan Chastain.  Susan and I became fast friends and she very generously continued to teach me jewelry making skills.

 Sterling silver, reticulated sterling silver, bronze, chrysocolla
Pin/pendant  Circa 2003

My first few years of jewelry making involved a lot of semi precious stones and minerals.  I started off making a lot of jewelry in Susan's style:  rustic, organic, a bit vintage, and very traditional. It was definitely something you wouldn't find in the latest fashion magazines.  I didn't want anything to do with the day's fashion trends.


Fine silver granulation, fresh water pearl, Circa 2005
In the summer of 2003, I took my first jewelry making class at the Penland School of Craft.  I learned granulation under Doug Harling.  Doug was another huge influence on my jewelry making career.  Doug's specialty is granulation jewelry.  He taught his technique (and taught me some non granulation techniques as well).  The granulation process was quite different than anything I had ever done.  The other exciting thing about granulation was that few other jewelry artists were doing the technique.  I was able to do something truly unique.


As much as I loved the granulation technique, one of the challenges is that it uses "purer" metal than I had used when doing the other style of jewelry.  I must use fine silver (100 percent silver -- sterling is only 92.5 percent silver) and high karat (18 to 22 karat) gold.  This was fine when the metals market was low, but once the economy took a downturn, precious metal investing became more popular and significantly raised metal prices.  Between the high prices for this kind of metal and the economic uncertainty, creating granulation jewelry wasn't economically feasible for me anymore.

Sterling silver, colored epoxy resin, 2010
I had been studying resin jewelry for awhile in books and magazines.  It interested me, but I hadn't had a chance to experiment with it yet.  In the summer of 2006, I was able to return to the Penland School of Craft to study resin jewelry making with Heidi Schwegler.  While her class lacked in the practical application of making wearable resin art jewelry, I was grateful to finally have the opportunity to learn the basics.  I got to work with silicone, epoxy and polyurethane resin.  I learned some basic skills and it definitely made me want to work with it more.

I'm still evolving with my resin jewelry, but love the journey.  I've been working exclusively with resins for only a year now, but am excited about where I might go next.

Friday, September 03, 2010

Resin Bracelet - How to Make resin jewelry

Share |
In the process of reviewing my google alerts this week for resin jewelry, I found this cute little video on resin jewelry making. While the video's star, Jennifer Perkins, does things differently than I do, I think viewers can watch it and get a great perspective on making resin jewelry. Maybe you will be inspired to make your own!

Friday, August 06, 2010

Getting a jewelry appraisal

Share |
I don't do jewelry appraisals, but sometimes I get questions from my art jewelry customers about getting their jewelry appraised by a professional. Having a appraisal done of your jewelry is a good idea because many homeowner's insurance policies will not cover the full value of your jewelry if it's lost or stolen.  I refer people to the article, Appraising Fine Jewelry, which covers the basic details of what you should have appraised, who you should get to do it, and what you can expect it to cost.  Once you have the jewelry appraisal, you can then get a "rider" to your homeowners' insurance policy, which will provide the extra coverage needed for your jewelry.

Monday, July 26, 2010

New jewelry making books added to my library

Share |
I love jewelry making books.  They are one of those things that I can never have too many of.  Whenever I'm close to a book store such as Borders or Barnes & Noble, I always have to stop in and see what's new.  Such was the case a couple of nights ago.

I found two books on jewelry making and metalsmithing techniques from an author I had never heard of.  Both books are by Anastasia Young, a jewelry artist from London.  At first look, I wasn't sure that I was going to learn anything or find out anything new from any of my other resource books.  The more I kept looking at the books, however, the more I liked her straightforward, factual approach to metalsmithing.  I also like that she includes practical examples and projects in order to learn different jewelry making techniques. 

It is definitely on my to-do list this week to enjoy these books over a glass of wine.

Monday, June 21, 2010

Vote for your favorite bracelet!

Share |
 I have a couple of resin bracelet prototypes finished and would like some opinions on what you think! 
Please vote on which one is your favorite.  (Neither bracelet is in "perfect" shape to sell -- so please vote and make comments on the "samples".)  The poll is at the end of this blog post.   

By the way, if you leave a constructive comment on this blog post about what you like, don't like, questions, concerns, etc. by June 30, I will enter you in a drawing for one of my resin bracelets once they're finished.  :)


 This resin bangle bracelet is made with one style of paper.  It completely encircles the inner part of the resin bracelet.
 This bracelet has multiple components, all with complimentary papers.  Several of the links have the striped paper shown in the bangle bracelet.
 It is a stretchy bracelet that can be considered a "one size fits all".

 The bracelet can be made to have all the colors on the backside be the same.


The resin bracelet is a "one size almost fits all".  I'm contemplating having two sizes available.


 The interior in this bracelet is white.  Others will have a different color on the interior.


 On a model!  (yes it's me)


It is a little loose on the wrist (no different from most bracelets.)


Complimentary papers and colors.


 The bangle on a model (yes me again).


It is definitely a little larger fit than the stretchy, but that's kinda what bangles are supposed to do.


Friday, June 18, 2010

The "Father" of my artisan jewelry career

Share |
In a Father's Day tribute of sorts, I would like to thank Doug Harling for being the "father" of my jewelry career.  (I have to put that in quotes because he's not really old enough to be my father.)

Full Measure, 2006
by Doug Harling
22k gold, black coral branch,
padparadscha sapphire
3.5" x 2.5" x 2.25"

I met Doug in the summer of 2003 when I took his granulation jewelry making class at the Penland School of Craft.  I was a last minute addition to the class and his was the only one that had openings.  (The other ironic part about this is that Doug was a replacement for the original teacher for the granulation class who had been injured in an accident.)  Doug is a very gifted jeweler and was on staff at the University of North Carolina at the time.

I joked that I was the class misfit.  I was the only one that didn't have or wasn't pursuing a bachelor's or master's in fine art.  I was incredibly touched that Doug didn't treat me any differently.  In fact, the second week of the class, he took every available moment he had to teach me EVERYTHING I wanted to know about jewelry making.  It was such an incredible gift, one that I will always be thankful for.  There is no way I can possibly repay him for all the knowledge I have gained.

Thank you Doug!  I will forever be grateful!

Monday, June 07, 2010

The business of making art

Share |
In my ideal world, selling my acrylic and resin jewelry would be like the Field of Dreams movie.  "Build it and they will come."  Alas if it were only that easy!  Having a successful artisan jewelry business requires active participation on my part.  I just can't simply make handcrafted jewelry and expect people to magically know to find me.  There presents the quandry.

Balancing the business of making contemporary jewelry and marketing contemporary jewelry is not easy.  I tend to get stuck on one or the other at some point.  Over the past week, I have been on a creative tear and find that I have to beat myself to follow up on emails and phone calls.  Perhaps it's because artists go through mental blocks too (at least this one does), so when I'm on a good creative track, I hate to give it up.

I write this blog post as motivation to help me find the right balance, which some days, is easier than others!  Okay, back to the studio.....

Monday, May 31, 2010

Find my resin jewelry in New Hampshire!

Share |
I am pleased to announce that I can now be found at Tulips, in Portsmouth, New Hampshire.  The store is owned by a mother/daughter team.  They have been in business for 29 years and recently moved into a new location at 62 Market Street.  While I was getting their order ready to ship out UPS this morning, I thought it would be fun to show everyone what I do to get resin jewelry ready to ship to customers and boutiques.
I've got my items laid out on my kitchen table.  I store the resin pieces individually in plastic ziploc bags and identify them with an inventory number on the outside of the bag.  I try to be environmentally friendly and reuse bags whenever possible.  I go over every piece one more time before sending and give another light coat of wax before it goes on its way.


The orange and yellow resin pendant on the right is in its storage bag.  Before I ship, I wrap the resin jewelry with tissue paper and repackage back into bags.


I include artist information cards to go with each purchase.  It gives customers a chance to get to me and my resin jewelry a little better.  I also include resin and sterling silver jewelry care instructions.


I also include a general "fact sheet" about KMS Designs and my resin and silver jewelry.  It gives the businesses more in depth information about me, my resin jewelry making processes, and resin jewelry care.  I also include information about how I make jewelry with sustainable jewelry making production methods.  I also recycle boxes in good condition.  The box at the right has been saved from a previous shipment of jewelry goods and materials.


Finally, I add some extra packing materials (recycled styrofoam peanuts) and send the package on its way.  I generally send items via postal mail, but this box is going UPS ground.  I can also do FedEx as well.  I have email notifications set up to let the customer know when the package ships.  Plus, there is a tracking number so anyone can find out where the package is at any moment.

Monday, May 17, 2010

New resin jewelry making tool

Share |
I've been playing around with resin jewelry for a while now. I've had a lot of fun and enjoy reading about other jewelry artists and their adventures in resin jewelry making.


I've been reading about how different jewelers remove bubbles from their resin.  Some use toothpicks, others blow on the resin, but I had read about a few using a heat gun to get the bubbles to rise to the top.  I ended up buying this heat gun from my local Michael's craft store.  Ironically enough, I purchased it to make the class project for another jewelry making class at Gifts of Avalon I hope to teach over the summer.  While I was pouring resin a couple of days ago, I decided to give it a try to see what it could do for bubbles in resin.


I have to say I was thrilled with the results.  It almost works like a hair dryer, with a couple of differences.  There is only one temperature (fairly hot) and the end of the heat gun is smaller than a hair dryer.  You don't need to apply it for very long to see the bubbles rise up out of the resin.  (I stayed back about 10 to 12 inches or so.)  You also have to move quickly because there is a fair bit of velocity behind the air.  Wow!  It's one of those things I wish I had tried sooner.

Wednesday, April 21, 2010

Make your own forged bracelet

Share |
I'm teaching a completely new class next month at Gifts of Avalon. In this class, I will show you how to forge a cuff bracelet from your choice of metal. Learn how to make the bracelets shown here. They will post information about upcoming classes in their next newsletter, but you can go ahead and call them directly at 352.379.1272 to sign up.


The top bracelet is made from copper. The bottom bracelet is made from brass. The copper bracelet has been finished to have a "multi color" look, whereas the brass bracelet does not have the patina.


Even if you have no metalsmithing experience, you will be able to make this bracelet.


A model shot! The funny part in this is that I was the model. Hard to hold the camera and extend my arm at the same time, but you get the idea.

Friday, April 02, 2010

Why didn't I think of that?

Share |
So I mentioned on the KMS Designs Facebook fan page a few days ago that I didn't like the pictures I had taken of my jewelry. Helen, one of my fans and newest friends, gave a suggestion on a setup to try. Once she mentioned it, I thought, why didn't I think of that?? I did some research on the setup she shared and had then idea to make my own. I took a styrofoam cooler and cut it to work for my tripod and camera. I like the resulting pictures much better! Thanks Helen!

Monday, March 29, 2010

It's prom season!

Share |
Yes, I'm a little too old to go the prom, but I came across a neat article from the Denver post the other day Prom Fashion: The long and short of Spring Formals. Neat article, mostly because I love that when you're young, you can wear whatever you want without judgment! (Case in point, the prom dress example shown here which is mentioned in the article.)

When I'm talking to people about my jewelry, I hear ladies talk about how they find some of my contemporary jewelry a little "too much" for them to wear. My advice? Go with colors you are comfortable with. If you're used to wearing blue, why not go with blue in a different setting? I'm from the school that believes less is more, especially when it comes to fashion and jewelry. Most of the fashion experts will tell you not to load up on every trend for a season. Pick a few that you like and feel comfortable with. You will wear them better because you are comfortable with them.

Contemporary art jewelry can be worm the same way! Pick a piece your two that you like (size, shape, color, etc.) and start with one piece (earrings, a pendant, one bracelet). Wear it a few times, then go from there on what to add next to your collection.

Thursday, March 25, 2010

Starting a new tradition

Share |
I get lots of nice comments from people that I meet at art shows, jewelry making classes, and such saying they feel like I'm "one of the family." I think these are some the nicest things anyone could say to me. I always try to treat people with respect and kindness and I'm glad to know that it shows. This got me thinking, why not make them a part of my family too? I thought that I would share, from time to time, some of my family's favorite recipes. My mother was a home economics teacher, so cooking and learning how to cook has been a part of my life ever since I can remember.

This recipe comes from a friend of mine in college. I thought this would be great to share since the Easter and Passover holidays just beg for brunches. This breakfast dish is wonderful to feed a crowd and since you make it the night before, it's the perfect "force me to be organized" breakfast dish.

Breakfast Casserole

1 1/2 boxes of Pepperidge Farm croutons or 8 slices of bread, cubed
3 cups of milk
4 eggs
1/4 tsp dry mustard
1 can cream of mushroom or cream of broccoli soup
2 to 3 cups of cheddar cheese (more or less to your liking)
1 pound of ground sausage
Package of ritz or saltine crackers
2 tablespoons of butter, melted

Spread bread/croutons in the bottom of a 9 x 13 inch pan. Mix 2 1/2 cups of the milk, eggs, and mustard. Pour over the croutons. Brown the sausage. Sprinkle the meat over the crouton mixture. Top with the cheese. Refrigerate overnight.

In the morning, mix the remaining 1/2 cup of milk with the soup. Pour over the casserole. Bake at 350 degrees for 1 hour. Crush a sleeve of crackers. Mix the crackers with the melted butter. Pour over the casserole for the last 5 to 10 minutes of baking.

Enjoy!

Wednesday, March 24, 2010

Photographing Jewelry

Share |
It is a beautiful day in Florida. Lots of bright sun and clear skies. This is the perfect day for me to take jewelry pictures outside. I love the natural light for taking pictures. It captures the colors the best and I only have to crop the pictures once I take them (versus using a photoeditor to adjust brightness, contrast and such).

I find a nice place to set up outside to get a good photograph. I always try to take pictures as close to 12 noon as possible in order to minimize shadows. My setup is a Fuji FinePix S7000 camera attached to a Benbo mini-trekker tripod. My backgrounds vary, depending on what I'm photographing. Today, I used a piece of ceramic tile.


So apparently, no jewelry work would be complete without help from my cat Karma. I hadn't seen her for hours and wouldn't you know it, here she comes to help.

So the ironic part in all this? I didn't like how they looked on the white tile. It was too much contrast between the tile and the jewelry. I dug out a piece of stained plywood I had and took pictures of the same jewelry on it instead.

Today's pictures were of my new acrylic and sterling silver jewelry line on the KMS Designs website. The pictures from today can also be seen on the KMS Designs Flickr page.
Related Posts with Thumbnails