Showing posts with label contemporary jewelry. Show all posts

Wednesday, June 15, 2011

Resin jewelry - what's popular this week

Share |
I learned two things several years ago when I started doing street festivals.

I can never predict what jewelry is going to be popular.
The same jewelry may not be popular for the next art show.

Apparently the wholesale art market isn't any different.

One of my best selling patterns last week was my resin cowgirl jewelry.  I don't sell this jewelry on my KMS Designs jewelry website, but on my other endeavor, Cow Art and More.  I was replenishing my inventory yesterday and I had hubby grab a few random picture of the pouring process.


Horseshoes and longhorns are in this batch.


There's also a few of the geometric and dottie patterns.  These will be ready to ship late Friday afternoon.

Wednesday, June 01, 2011

New resin jewelry in pewter

Share |
I want to share a preview of my new resin earrings and pendants with blog readers.  WOO HOO!  They will be listed for sale on my "new and improved" website coming soon!

Brief description:  earrings are 1/2 inch round or square and hang on sterling silver filled ear wires, earring "doubles" are 1/2 inch wide by 1 inch long and hang on sterling silver filled ear wires, pendants are 7/8 inches round/square and hang on a sterling silver plated snake chain.


Saturday, April 30, 2011

5 biggest blunders men make when buying jewelry for Mother's Day

Share |
*Ladies, since so many of you responded that this article was helpful to your men, I am sharing it again.*

I love it when guys are buying jewelry for their ladies. It's such a sweet and thoughtful notion on their part. I LOVE to help them! Unfortunately, it doesn't always turn out well, so I wanted to share the top five mistakes guys make buying jewelry:

1. Not knowing the details. I have actually had men buy earrings for a gift and not know if the woman had pierced ears. Wow! Major gamble! Find out as much information about your lady as possible. A good start is to find out a ring size, bracelet size, preferred length of necklaces, color preferences, metal preferences and any allergies.

2. Getting her something she doesn't have. This is only a good thing if you have heard her say that she wants a ".....". For example, if she doesn't own any bracelets, there may be a good reason why. Maybe she has a job where it gets in the way or she would have to take it off frequently. Take a quick inventory of her jewelry and get an idea of what she prefers or take notes the next time you are window shopping together.

3. Not considering the "what ifs". Is your jewelry purchase sizable? Can you return or exchange it if she doesn't like it? What if she likes the pendant but wants a different chain? Understand the exchange and return policy on the jewelry BEFORE you purchase it.

4. Buying something that doesn't go with her body type. Believe it or not, how a piece of jewelry is shaped or formed impacts how it looks on a person. For example, round earrings do not look good on a woman with a round face. A small pendant on a short chain isn't particularly flattering to a curvaceous woman with a large bustline. When you're buying the piece, get the person helping you to give suggestions or even the model the jewelry if necessary to help with the decision making process.

5. Buying something that doesn't go with her style. Buy her something she will wear! If she doesn't go to a lot of fancy occasions, she may not get a lot of wear from a big, fancy cocktail ring. Inexpensive earrings may be a better fit for daily wear. If she does a lot of work with her hands, a ring may not hold up to her rough schedule, but a necklace might fit the bill

Mother's Day is coming up and I am happy to help the guys out there get a special gift for the moms in their lives. Contact me at the KMS Designs jewelry website for help getting your special gift.

Friday, February 11, 2011

Random resin jewelry photos

Share |
A few random photos from the week.


A large wholesale order.  These will be sold online.  They are individually packaged and each has an organza ribbon necklace.


An assortment of pendants for a wholesale order.  These are going to Wild Ruby in Framingham, Massachusetts.


Detail view of the same group of resin pendants.


A group of delicious designer art deco jewelry.  (Had to insert some literary skills here)  Actually they are mostly flower and snowflake pendants.


These jewelry trays have more contemporary necklace styles: asian flowers and "kaleidoscope" patterns.


A close up of some of the flower pendants in green and pink.  Some need the silver tone bails attached.


By the way, in case you missed it, I put some new resin scrabble tile pendants on the KMS Designs website his week.

Monday, January 31, 2011

Finishing up my last big resin jewelry order

Share |
In terms of my resin jewelry orders from the wholesale show last week, I saved the biggest until last.  It was an order for 160 of the scrabble tile pendants.  I decided to save this order until the end because there were so many patterns involved; I needed to make sure to keep everything straight!  Things were going well until I started to pour the epoxy resin.  Let's just say, I learned only to pour about 75 to 100 pendants in one day.  Between smelling the slightly noxious odor and seeing bubbles in my sleep (in the resin, not the kind in the picture, although that would have been nice), I had enough resin pouring in one day to last an entire week.  The good news is that they're done and curing and should get shipped out by the end of the week.  Maybe I will open a bottle of bubbles to celebrate.....

Wednesday, January 19, 2011

Pictures of new resin jewelry

Share |
So I'm a bit nutty this week getting ready for ACRE Orlando.  I always have this last minute push to get new jewelry done, for whatever reason.  (I can be a bit hard on myself.)  Anyway, I don't have time to write much, but instead will show some pictures of work I just poured.  Look for them on KMS Designs next week.


Wednesday, December 29, 2010

What jewelry questions do you have?

Share |
Have a burning question you're dying to ask?  Looking for answers to your jewelry making questions or just have a curious question about art jewelry?  Leave your response here or if you want to remain anonymous, send an email to kmsdesigns@hotmail.com.  I'll post the answers to the questions next week!

Monday, December 20, 2010

Jewelry projects - What I'm working on now

Share |
As far as my jewelry making business goes, holiday gifts are over by December 15. Most everyone has either purchased from me at a retail show, or have bought their jewelry and had it shipped. I sometimes will get a last minute order, but for the most part, the holiday is done. So what am I working on now?


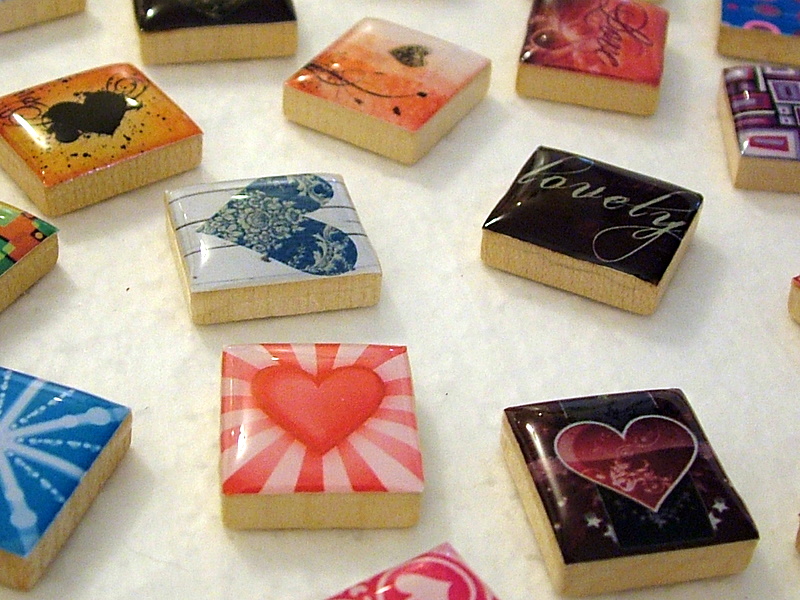
These are a couple of new scrabble tile patterns I have almost finished.  I hope to have them photographed and on the KMS Designs website by the end of the year. 


Are those Valentine's Day heart jewelry patterns?  Yes!  While Christmas and Hanukkah may be over, the next holiday is just beginning.  In order for me to have enough Valentine's Day jewelry inventory, I have to start now.


This is a another tray of the resin and sterling silver jewelry.  This line of jewelry is at a crossroads for me.  I love to make it and customers are drawn to it.  The complication is that the price of silver continues to climb at an astronomical rate.  (As I write this, the price of silver is up 60 percent in the last four months alone.)  I am faced with the choice to continue making the pieces as I have been and raise prices, or find a way to make the pieces differently, at the same price, while still appealing to customers.  Stay tuned on this one.


The last (but certainly not least!) thing that I'm working on is getting ready for my first wholesale show in Orlando, Florida, next month.  I'm represented by wholesalecrafts.com and will be exhibiting there.  More to come on this big project!

Monday, November 29, 2010

#Cybermonday and December holiday special

Share |
For any of my resin or silver jewelry you purchase between now and December 24, I will gladly gift wrap or gift box at no additional charge.  I can even send it directly to the recipient!  Just let me know in the "special instructions to seller" box when you checkout on Paypal, or let me know when you call to place an order.


Items under $25 are packaged on a card and included in a cellophane bag.  It is then wrapped with tissue paper and finished with a holiday ribbon.  A gift card with your personal message is included as well.


Silver jewelry or Resin jewelry pieces priced at $25 or more will be included in a purple, cardboard gift box.  It is finished with a raffia bow.  A gift card is included with these as well.


I ship all jewelry in a padded envelope (for those placed on cards) or a recycled cardboard box.  All my jewelry pieces ship via U.S. postal service with a package tracking number.  I am happy to ship UPS or FedEx for an additional charge.

Need your package shipped internationally?  No problem!  Please contact me with the destination address and will let you know of the additional postal charges.

Wednesday, November 10, 2010

Handmade silver and resin jewelry video

Share |
I finally took the plunge into making a "movie" about my resin jewelry. It's been something I've wanted to do, but quite frankly, I just didn't know how to do it. A blogging buddy of mine turned me on to Windows Movie Maker and I used it to create this two minute video about my silver and resin jewelry. While it's not going to win an Academy Award for best short documentary, I think it turned out pretty well. Enjoy!

Friday, September 17, 2010

Resin jewelry tips

Share |

I found another resin jewelry making tips video to share with readers.  I also use the clear molds she uses in her video for the very reason:  being able to see the bubbles!  It is so much easier to find them when you can look from beneath.  This short 3 1/2 minute video will also give you an idea of what it looks like when you place found objects in the first layer of (clear) resin.

Friday, September 03, 2010

Resin Bracelet - How to Make resin jewelry

Share |
In the process of reviewing my google alerts this week for resin jewelry, I found this cute little video on resin jewelry making. While the video's star, Jennifer Perkins, does things differently than I do, I think viewers can watch it and get a great perspective on making resin jewelry. Maybe you will be inspired to make your own!

Monday, August 02, 2010

Making resin jewelry bracelets, Part 6

Share |
(Read part 1, part 2, part 3, part 4, and part 5 of the resin jewelry making process)

So whenever I have drilled holes in my resin bracelet links in the past, I have always done it by hand.  I sit at my bench and use my flex shaft with a size #61 drill bit.


I simply "eyeball" where to drill the hole and hope that I get it in straight.  Sometimes this works, sometimes it doesn't.  If I don't stay in the right geometrical plane, I either drill out the back, or when I come out on the other side, the two holes are a lot closer or further away than they are on the other side.


I decided to get a drill press to help me make the drilling process easier.  I installed it next to my jewelry bench.


Being next to my jewelry press, I don't have to purchase another flex shaft.  I only have to swing the one I have over to the drill press and set it up in the drill press.  To drill I use the foot pedal of the flex shaft to "give it some gas".  I use the level handle on the right to move the drill bit up and down.


I have a vise bolted on to the base the flex shaft.  It won't come off during the drilling, but I can move it forward or side to side to exactly adjust it.  I have my resin piece in the jaws of the vise.  It is protected by a piece of fleece, which I found out may not still be enough if I "crank down" the jaws too hard.  (I actually imprinted the jaws into a couple of pieces.)


I found I actually had to move the drill bit up and down several times to remove all my resin "crumbs".  The shavings would clog up my hole, which doesn't allow me to string the pieces.  I also found out that if I wasn't careful with how I placed the piece in the jaws, I could still drill incorrectly.  This was due to the fact that the one side is a convex surface, so I have to be absolutely sure the jaw is hitting the piece at the highest point.  Otherwise the angle is off and I still end up drilling out the back.


Overall, I think this will be a help, but I still have more practicing to do.

The next step is to string an polish my resin bracelet!

Wednesday, July 28, 2010

Photographing new jewelry

Share |
I have some new resin pendants using recycled Scrabble tiles.  I'm just now starting to list the first set of resin necklaces with cupcake designs, but I have lots more designs to list as well.  I love the look of these:  dainty, cute, unpretentious.  As much as I love the necklaces, I'm "unsettled" with the photography.

There are several aspects of my jewelry photography that I'm struggling with.  First of all, I'm having a hard time getting the true beauty of the pieces to translate onto a computer screen.  I've heard multiple times from customers that my jewelry is much prettier and nicer in person.  It's certainly meant as a compliment, but I also know that means my jewelry pictures just aren't that great.  I struggle with lighting, backgrounds, angles, and much more.  This is definitely one of those jobs that I would be happy to have someone else do on a regular basis.

I also struggle with using photoediting software such as Photoshop.  First, I'm a bit of a "purist" about capturing images of my resin jewelry.  I don't think it's fair to do much more than correct a wrinkle or adjust the contrast.  I don't want to manipulate images so much that it's completely computer generated.  Secondly, I just don't have a good grasp on using Photoshop.  Maybe if I was better at using it, I wouldn't feel so bad about using it to improve my jewelry photographs.

The important part in all this, is that I want to hear what readers think.  I want to hear your perspective as a customer, another artist, general fashion enthusiast, or whatever!  Do you like seeing the jewelry on the natural, beige colored stone?  Do you like a completely blank (white) background better?  Would you rather see it on a model?  How about the graduated light gray to dark gray background (see an example here)?  A fresh set of eyes might just help direct me on how to photograph my resin jewelry.

P.S.  If you're looking for the next post on the resin bracelet making process, I promise it's coming.  I decided to install a new piece of equipment to help me with the procedure, which I will talk about in the post.

Friday, July 16, 2010

Making resin jewelry bracelets, Part 4

Share |
(Read part 1, part 2, and part 3 of the resin jewelry making process)


So the clear resin has cured for about 1 to 2 days.  I can add the color behind it.


To go with this set of papers, I am doing this batch in a medium pink.  I mix the resin just as I did before and pour it on top of the clear resin with the papers that have already cured.  I also pass my heat gun over the top to remove any bubbles that may have occurred.  In the past, I have had about 60 minutes to be able to work with this resin in its liquid form (also known as pot time).  For some reason, I have only had about 15 to 20 minutes here recently to be able to work with it.  I'm sure it's temperature and humidity related.  The resin is still curing properly, so I haven't been too concerned.


Once the pink layer of resin has completely cured, I can pop the pieces out of their mold.  If you look carefully at the edges, you will see there is excess resin that needs to be sanded.


If the resin is thin enough, I can trim the excess with heavy duty scissors before I sand and finish them.


This picture shows that there are two layers of resin to each bracelet link:  a clear top layer and a colored bottom layer. 


While tiny bubbles are to be expected in resin jewelry, the piece at left shows what happens if I don't get out the bubbles trapped underneath the papers in the clear layer.  This piece is headed for the scrap pile.  Darn!


The next step is to show some of the sanding and how I drill the pieces.

Monday, July 12, 2010

Making resin jewelry bracelets, Part 3

Share |
(In case you missed other posts you can read part 1 and part 2)

I wear nitrile gloves whenever I'm working with resin.  The resin can be irritating to the skin and it's downright sticky.  I always use nitrile gloves (versus latex) because some types of resin will react with latex.  I use small plastic mixing cups (seen on the far left) with graduations on the side.  It allows me to visually measure exact amounts of resin.  (These happen to be cups with dram marks on the side.)


These are the finished, sealed papers.  They have been cut and sealed twice.


To make these resin bracelet links, I will be using a clear, plastic mold.  This will allow me to lift up the mold and see if there are any bubbles trapped underneath the papers once I place them.

Since I pour resin at odd hours of the day and night, (and this time was no exception), I don't have anyone available to take pictures of the pouring process.  To give you a mental image here, I mix the two cups of carefully measured resin together and pour into the mold.


I only pour the mold about halfway full.  I then carefully slide the sealed paper into the mold with the back side facing me.  I lift each mold to see if there are bubbles trapped underneath the papers.  If there are, I use a toothpick to tap the papers and the heat from my heat gun (the blue thing in the picture) to draw the bubbles out.

Once everything is poured, I cover the resin molds and let them sit to cure.  The initial cure takes about 24 hours.

The next step:  adding color to the back.

Saturday, July 03, 2010

Making resin jewelry bracelets, Part 2

Share |
Part 2 of the resin bracelet making process

So now that I've placed the first coat of the sealant on the paper, it's time for me to cut.  For these resin bracelets, I need 5/8 inch squares.  I cut a 5/8 inch paper strip using a ruler and an exacto knife.


I then cut the strip into 5/8 inch squares using a T-square and an exacto knife.  (Don't forget to use newspaper or some other padding under your blade or you will make marks into the surface you're cutting on.)


You can see now that I have a bunch of squares in the paper pattern I've previously sealed.


I don't like the "sharp" corners on the squares, so I round the edges off with scissors.

You can see the finished squares here.  The top ones will be used.  The bottom ones are shown before the edges get rounded off.


The next step is to reseal them again with the decoupage glue.

Check back next week for the next step!

In case you missed it, Part 1 of the resin jewelry bracelet making process

Related Posts with Thumbnails