
Showing posts with label artisan jewelry. Show all posts
Showing posts with label artisan jewelry. Show all posts
Friday, September 03, 2010
Resin Bracelet - How to Make resin jewelry
In the process of reviewing my google alerts this week for resin jewelry, I found this cute little video on resin jewelry making. While the video's star, Jennifer Perkins, does things differently than I do, I think viewers can watch it and get a great perspective on making resin jewelry. Maybe you will be inspired to make your own!


Monday, August 16, 2010
A day in the life of an art jewelry maker
 I don't really know how typical my day is compared to other people. I'm sure for moms out there that are trying to balance a career and family life, much of what I say here will sound familiar. I get questions form art enthusiasts and patrons just how I manage to get done what I do. Here is my typical day:
Up between 5 AM and 6 AM. With any luck, my kids aren't up yet. If I manage to get to bed at a decent hour the night before, it's closer to 5 AM. My list of things to get done in the morning before 7 AM is:
- Read and respond to emails
- Read my google alerts
- Read the blogs I follow
- Package orders and prepare them for mailing (to hand to hubby to mail on his way to work)
- Post updates and make changes to my jewelry gallery website, KMS Designs
- Write blog posts for this blog and my other jewelry blog, Handmade Resin Jewelry
- Use Hoot Suite to get my tweets ready for the day. (I like to tweet live, but when I find good articles, I like to schedule them to go out all during the day instead of one big lump.)
- Seal papers for resin
- Photograph jewelry (weather permitting)
- Upload new pictures to my Facebook and Flickr pages.
- Prepare metal pieces and settings to have resin included in them later
After my kids are in bed (about 9 PM or so during the summer), I get back to work. I'm up until 10 PM or possibly as late as midnight. The later I go to bed, the later I start the next morning (although it's not really sleeping in...)
- Pour resin
- Sand, polish and drill resin pieces as needed
- Assemble finished resin jewelry components
- Make website and blog updates
So for all you moms out there, how else do you balance work and family life?
Monday, July 12, 2010
Making resin jewelry bracelets, Part 3
(In case you missed other posts you can read part 1 and part 2)
 I wear nitrile gloves whenever I'm working with resin. The resin can be irritating to the skin and it's downright sticky. I always use nitrile gloves (versus latex) because some types of resin will react with latex. I use small plastic mixing cups (seen on the far left) with graduations on the side. It allows me to visually measure exact amounts of resin. (These happen to be cups with dram marks on the side.)
 These are the finished, sealed papers. They have been cut and sealed twice.

To make these resin bracelet links, I will be using a clear, plastic mold. This will allow me to lift up the mold and see if there are any bubbles trapped underneath the papers once I place them.
Since I pour resin at odd hours of the day and night, (and this time was no exception), I don't have anyone available to take pictures of the pouring process. To give you a mental image here, I mix the two cups of carefully measured resin together and pour into the mold.

I only pour the mold about halfway full. I then carefully slide the sealed paper into the mold with the back side facing me. I lift each mold to see if there are bubbles trapped underneath the papers. If there are, I use a toothpick to tap the papers and the heat from my heat gun (the blue thing in the picture) to draw the bubbles out.
Once everything is poured, I cover the resin molds and let them sit to cure. The initial cure takes about 24 hours.
The next step: adding color to the back.
 I wear nitrile gloves whenever I'm working with resin. The resin can be irritating to the skin and it's downright sticky. I always use nitrile gloves (versus latex) because some types of resin will react with latex. I use small plastic mixing cups (seen on the far left) with graduations on the side. It allows me to visually measure exact amounts of resin. (These happen to be cups with dram marks on the side.)
 These are the finished, sealed papers. They have been cut and sealed twice.
To make these resin bracelet links, I will be using a clear, plastic mold. This will allow me to lift up the mold and see if there are any bubbles trapped underneath the papers once I place them.
Since I pour resin at odd hours of the day and night, (and this time was no exception), I don't have anyone available to take pictures of the pouring process. To give you a mental image here, I mix the two cups of carefully measured resin together and pour into the mold.

I only pour the mold about halfway full. I then carefully slide the sealed paper into the mold with the back side facing me. I lift each mold to see if there are bubbles trapped underneath the papers. If there are, I use a toothpick to tap the papers and the heat from my heat gun (the blue thing in the picture) to draw the bubbles out.
Once everything is poured, I cover the resin molds and let them sit to cure. The initial cure takes about 24 hours.
The next step: adding color to the back.
Saturday, July 03, 2010
Making resin jewelry bracelets, Part 2
Part 2 of the resin bracelet making process
 So now that I've placed the first coat of the sealant on the paper, it's time for me to cut. For these resin bracelets, I need 5/8 inch squares. I cut a 5/8 inch paper strip using a ruler and an exacto knife.
 I then cut the strip into 5/8 inch squares using a T-square and an exacto knife. (Don't forget to use newspaper or some other padding under your blade or you will make marks into the surface you're cutting on.)

You can see now that I have a bunch of squares in the paper pattern I've previously sealed.

I don't like the "sharp" corners on the squares, so I round the edges off with scissors.
 You can see the finished squares here. The top ones will be used. The bottom ones are shown before the edges get rounded off.
The next step is to reseal them again with the decoupage glue.
Check back next week for the next step!
In case you missed it, Part 1 of the resin jewelry bracelet making process
 So now that I've placed the first coat of the sealant on the paper, it's time for me to cut. For these resin bracelets, I need 5/8 inch squares. I cut a 5/8 inch paper strip using a ruler and an exacto knife.
 I then cut the strip into 5/8 inch squares using a T-square and an exacto knife. (Don't forget to use newspaper or some other padding under your blade or you will make marks into the surface you're cutting on.)
You can see now that I have a bunch of squares in the paper pattern I've previously sealed.

I don't like the "sharp" corners on the squares, so I round the edges off with scissors.

The next step is to reseal them again with the decoupage glue.
Check back next week for the next step!
In case you missed it, Part 1 of the resin jewelry bracelet making process
Thursday, June 24, 2010
My new jewelry making class - Forged metal pin


 This brooch is completely made without soldering! I made this brooch with brass wire, but class attendees can make it with copper, sterling silver or gold fill wire if desired. NO experience is necessary.
The class will be officially announced in Gift's of Avalon's newsletter going out next week, but you can register for it now by calling them.
I am also teaching the forged bracelet class on July 12 for anyone interested in signing up for that class as well.
Monday, June 21, 2010
Vote for your favorite bracelet!

Please vote on which one is your favorite. (Neither bracelet is in "perfect" shape to sell -- so please vote and make comments on the "samples".) The poll is at the end of this blog post.
By the way, if you leave a constructive comment on this blog post about what you like, don't like, questions, concerns, etc. by June 30, I will enter you in a drawing for one of my resin bracelets once they're finished. :)


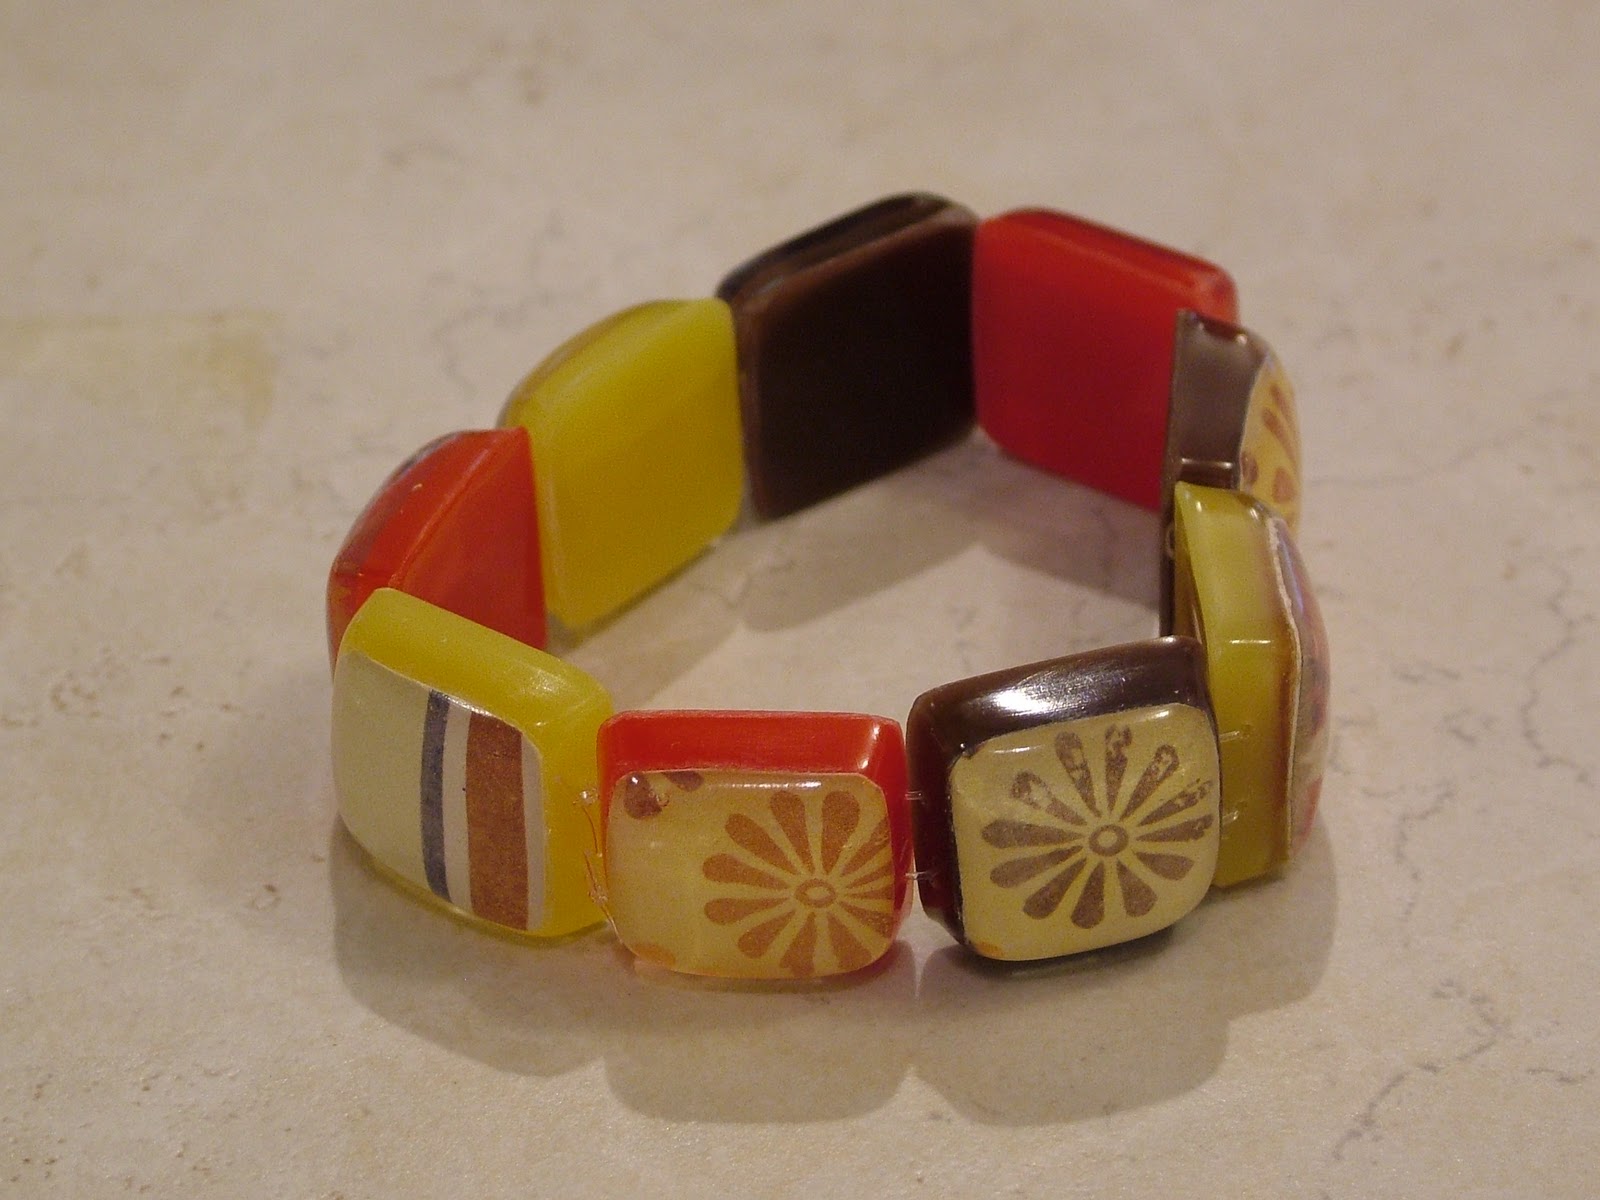


The bracelet can be made to have all the colors on the backside be the same.
The resin bracelet is a "one size almost fits all". I'm contemplating having two sizes available.

The interior in this bracelet is white. Others will have a different color on the interior.


It is definitely a little larger fit than the stretchy, but that's kinda what bangles are supposed to do.
Friday, June 18, 2010
The "Father" of my artisan jewelry career
In a Father's Day tribute of sorts, I would like to thank Doug Harling for being the "father" of my jewelry career. (I have to put that in quotes because he's not really old enough to be my father.)
I joked that I was the class misfit. I was the only one that didn't have or wasn't pursuing a bachelor's or master's in fine art. I was incredibly touched that Doug didn't treat me any differently. In fact, the second week of the class, he took every available moment he had to teach me EVERYTHING I wanted to know about jewelry making. It was such an incredible gift, one that I will always be thankful for. There is no way I can possibly repay him for all the knowledge I have gained.
Thank you Doug! I will forever be grateful!
 |
| Full Measure, 2006 by Doug Harling 22k gold, black coral branch, padparadscha sapphire 3.5" x 2.5" x 2.25" |
I met Doug in the summer of 2003 when I took his granulation jewelry making class at the Penland School of Craft. I was a last minute addition to the class and his was the only one that had openings. (The other ironic part about this is that Doug was a replacement for the original teacher for the granulation class who had been injured in an accident.) Doug is a very gifted jeweler and was on staff at the University of North Carolina at the time.
Thank you Doug! I will forever be grateful!
Friday, June 11, 2010
Making new resin jewelry -- the next step

A couple of weeks back, I showed the first part of the new resin bracelets I am designing. I've got some pictures showing adding the layer of colored resin to the back of the links.


You can see how different the papers look with a different color resin poured on the back of the bracelet link. I think it gives some "character" to the paper design.

The links are about 1/2 inch total in height. I haven't decided yet whether or not I want to mix the colors or keepthem all the same.
 I try to keep the top layer of clear resin with the paper as thin as possible to allow me to get a thicker layer of color on the back. (Just a note here, it wasn't the best lighting. The pieces in the front are actually a deep red, not the bright orange red that they look like here.)
The next step will be to sand off any rough edges and string them onto a bracelet. Stay tuned.
Monday, May 31, 2010
Find my resin jewelry in New Hampshire!
I am pleased to announce that I can now be found at Tulips, in Portsmouth, New Hampshire. The store is owned by a mother/daughter team. They have been in business for 29 years and recently moved into a new location at 62 Market Street. While I was getting their order ready to ship out UPS this morning, I thought it would be fun to show everyone what I do to get resin jewelry ready to ship to customers and boutiques.
 I've got my items laid out on my kitchen table. I store the resin pieces individually in plastic ziploc bags and identify them with an inventory number on the outside of the bag. I try to be environmentally friendly and reuse bags whenever possible. I go over every piece one more time before sending and give another light coat of wax before it goes on its way.
 The orange and yellow resin pendant on the right is in its storage bag. Before I ship, I wrap the resin jewelry with tissue paper and repackage back into bags.
 I include artist information cards to go with each purchase. It gives customers a chance to get to me and my resin jewelry a little better. I also include resin and sterling silver jewelry care instructions.
 I also include a general "fact sheet" about KMS Designs and my resin and silver jewelry. It gives the businesses more in depth information about me, my resin jewelry making processes, and resin jewelry care. I also include information about how I make jewelry with sustainable jewelry making production methods. I also recycle boxes in good condition. The box at the right has been saved from a previous shipment of jewelry goods and materials.
 Finally, I add some extra packing materials (recycled styrofoam peanuts) and send the package on its way. I generally send items via postal mail, but this box is going UPS ground. I can also do FedEx as well. I have email notifications set up to let the customer know when the package ships. Plus, there is a tracking number so anyone can find out where the package is at any moment.

 The orange and yellow resin pendant on the right is in its storage bag. Before I ship, I wrap the resin jewelry with tissue paper and repackage back into bags.
 I include artist information cards to go with each purchase. It gives customers a chance to get to me and my resin jewelry a little better. I also include resin and sterling silver jewelry care instructions.
 I also include a general "fact sheet" about KMS Designs and my resin and silver jewelry. It gives the businesses more in depth information about me, my resin jewelry making processes, and resin jewelry care. I also include information about how I make jewelry with sustainable jewelry making production methods. I also recycle boxes in good condition. The box at the right has been saved from a previous shipment of jewelry goods and materials.
 Finally, I add some extra packing materials (recycled styrofoam peanuts) and send the package on its way. I generally send items via postal mail, but this box is going UPS ground. I can also do FedEx as well. I have email notifications set up to let the customer know when the package ships. Plus, there is a tracking number so anyone can find out where the package is at any moment.
Thursday, May 27, 2010
New resin bracelets
 I have found some great papers and vintage postcards and stationery that I'm working on getting into resin bracelets. I am still in the prototype stage, but you can look at the samples and get an idea what I'm thinking.
I'm excited these will be soo cute when I get them done. Stay tuned while I work out the kinks.
Subscribe to:
Posts (Atom)
