Showing posts with label resin bracelets. Show all posts

Monday, August 09, 2010

Making resin jewelry bracelets, Part 7

Share |
(Read part 1, part 2, part 3, part 4, part 5, and part 6 of the resin jewelry making process)

Now that I've got the individual pieces sanded and drilled, it's time to assemble and polish the pieces.


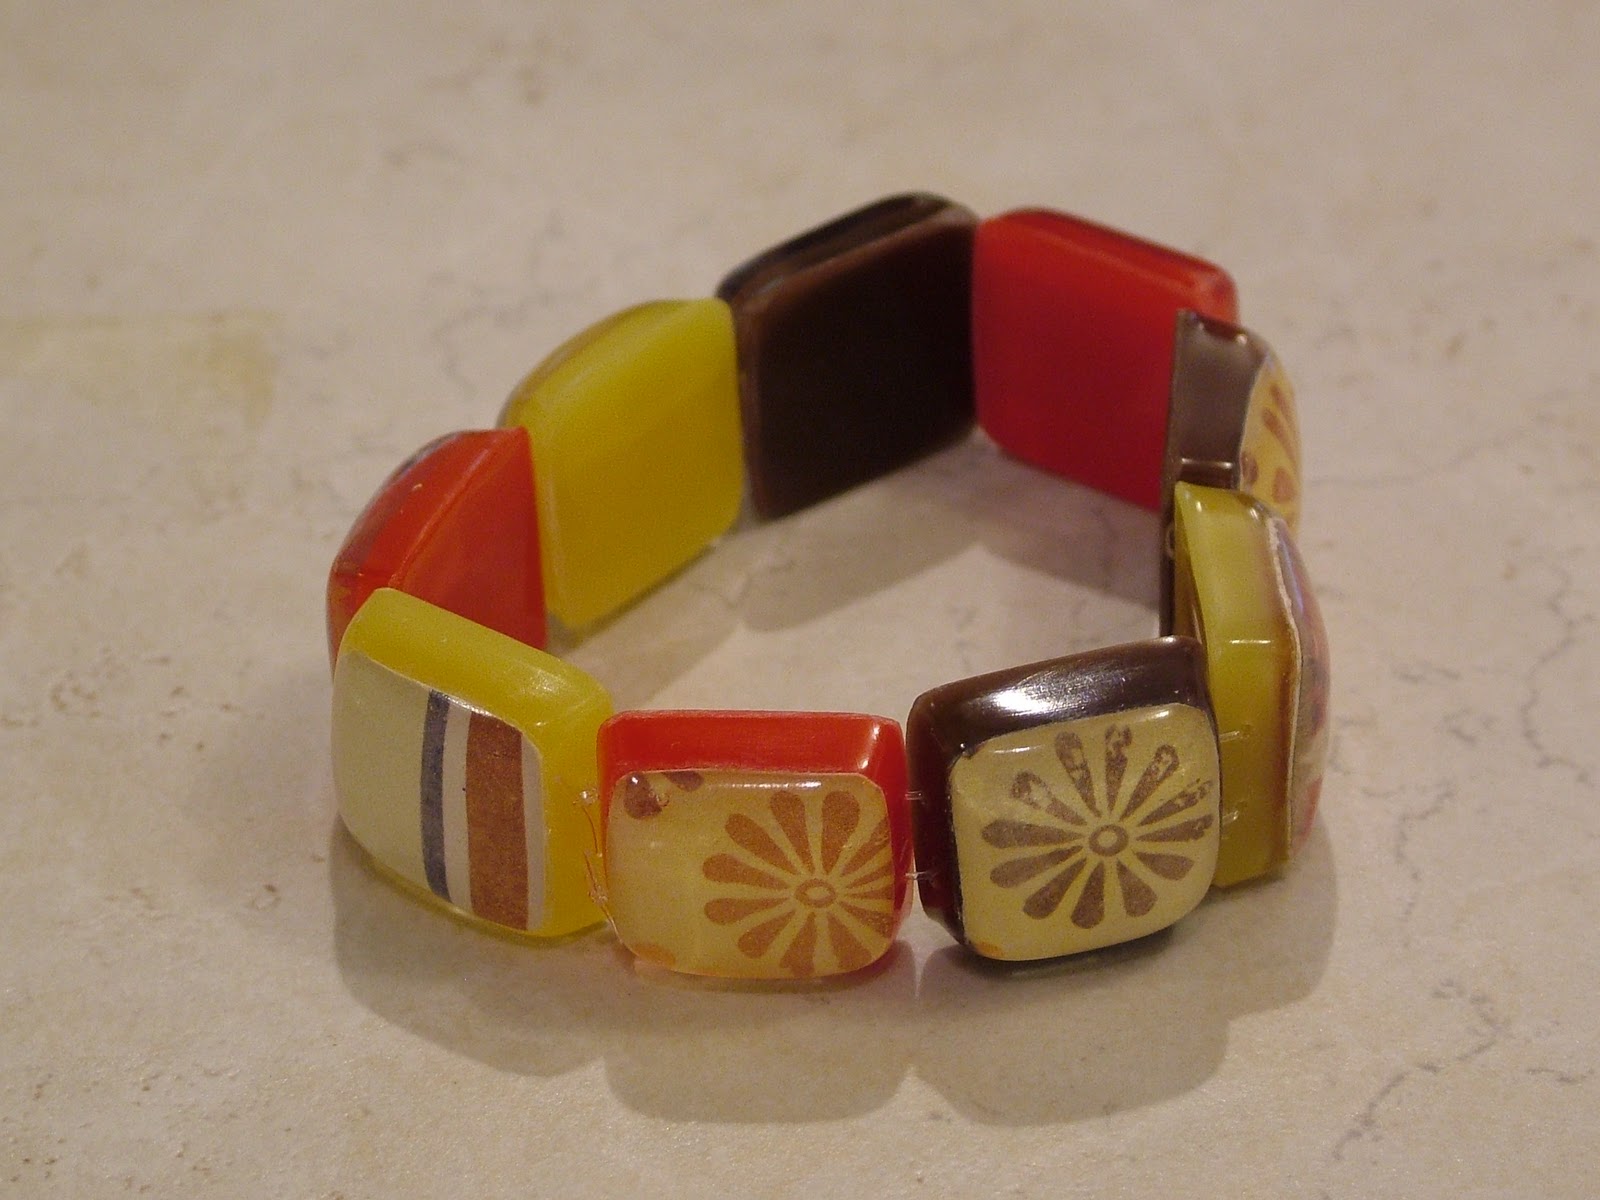
These are the bracelet links I'm going to use.  It's just a random, complimentary assortment of the links.


I line them up in the order that I like.  For the most part, it's random, but I try to make sure I don't have all the same paper patterns next to each other.  I try to mix it up.


 I thread my stretch plastic cord through the holes.  Remember how I was being so  particular about making sure the drilled holes were free of shavings?  This is why.  I can't thread the plastic through if anything is in the way.


I have the first set of holes threaded.  Now I go back and do the second set.


Once I have the cord strung through both sides, I tie a square knot into each piece.


After trimming the ends of the cord, I give the bracelet one last good shine with some wax. 


This is it!  Can you believe it's finally done?


So here's the question I need answered from fans and visitors:

After seeing the posts on how to make this bracelet and seeing the finished resin bracelet above, what would you expect to pay for a piece of art jewelry like this?

Friday, July 30, 2010

Making resin jewelry bracelets, Part 5

Share |
(Read part 1, part 2, part 3, and part 4 of the resin jewelry making process)

 The next part in the resin jewelry making process is for me to finish up the edges of each individual bracelet link.  After each piece has cured, I pop each one out of its mold.  (It takes at least 72 hours for it to completely cure.)  For the pieces that have a lot of extra resin, I can trim them with some heavy duty scissors.


To take the sharp edges off each piece, I have to sand it with several different grits of sandpaper.  I do this on a flat surface under water.  Why underwater?  As the friction generates heat, the "crumbs" will melt back onto the piece unless I do it underwater.  I sand the back and the edges with 3 different grits of sandpaper.


Check back for Monday's post where I finally drill the pieces and show everyone my new drill press.

Monday, June 21, 2010

Vote for your favorite bracelet!

Share |
 I have a couple of resin bracelet prototypes finished and would like some opinions on what you think! 
Please vote on which one is your favorite.  (Neither bracelet is in "perfect" shape to sell -- so please vote and make comments on the "samples".)  The poll is at the end of this blog post.   

By the way, if you leave a constructive comment on this blog post about what you like, don't like, questions, concerns, etc. by June 30, I will enter you in a drawing for one of my resin bracelets once they're finished.  :)


 This resin bangle bracelet is made with one style of paper.  It completely encircles the inner part of the resin bracelet.
 This bracelet has multiple components, all with complimentary papers.  Several of the links have the striped paper shown in the bangle bracelet.
 It is a stretchy bracelet that can be considered a "one size fits all".

 The bracelet can be made to have all the colors on the backside be the same.


The resin bracelet is a "one size almost fits all".  I'm contemplating having two sizes available.


 The interior in this bracelet is white.  Others will have a different color on the interior.


 On a model!  (yes it's me)


It is a little loose on the wrist (no different from most bracelets.)


Complimentary papers and colors.


 The bangle on a model (yes me again).


It is definitely a little larger fit than the stretchy, but that's kinda what bangles are supposed to do.


Friday, June 11, 2010

Making new resin jewelry -- the next step

Share |

A couple of weeks back, I showed the first part of the new resin bracelets I am designing.  I've got some pictures showing adding the layer of colored resin to the back of the links. 


These resin bracelet jewelry links are using the papers I have sealed.  (Notice there's no watermarks this time.)  I put them in the mold first with a layer of clear resin to make the "top" part of the bracelet link.  It takes three days in between pours to allow the resin plenty of time to cure.


You can see how different the papers look with a different color resin poured on the back of the bracelet link.  I think it gives some "character" to the paper design.


The links are about 1/2 inch total in height.  I haven't decided yet whether or not I want to mix the colors or keepthem all the same.


I try to keep the top layer of clear resin with the paper as thin as possible to allow me to get a thicker layer of color on the back.  (Just a note here, it wasn't the best lighting.  The pieces in the front are actually a deep red, not the bright orange red that they look like here.)

The next step will be to sand off any rough edges and string them onto a bracelet.  Stay tuned.
Related Posts with Thumbnails