I follow the art business blog of Alyson B. Stanfield. If you're an artist, regardless of the media, I think you can find value in the information she shares. One of my favorite blog posts to this day, is her post encouraging artists to spend at least 15 minutes a day on their art. Ever since hearing that post as a podcast on my iPod, I make it a point to do just that. I try work on the part of my art daily that energizes me: pouring resin, working with digital art, planning colors, or anything similar. It's a bit crazy in my house so I don't always get it done, but I aim to do something fun with the art daily. It keeps me connected and focused on my art and quite frankly, gives me some sanity in this crazy circus of my house.
I would challenge you (even if you're not artists) to find something that energizes you and do it for 15 minutes every day. (and comment below on what that is. I'm eager to find out what energizes YOU.)
Tuesday, October 18, 2011
Sunday, October 16, 2011
What food means in this house #BAD11 #FoodDay
Food is more than just food in this house. It's been a way for me to connect with my family. I never would have guessed that 3 little boys would love helping their mom in the kitchen, but they do.... and I have found that I adore having them with me. I knew from when they were just crumb crunchers scooting around on the floor that I wanted them to learn how to cook so that they wouldn't starve when they went off to college, but I didn't know that it was going to be a fun time for us to bond and grow as a family. Who knew that teaching life skills would be just as valuable to me as it is to them. You can catch up with some of my food related posts here:
Brownie Making Day
Breakfast Casserole Recipe
My favorite Malbec wine
Death by Chocolate recipe
Iron Chef and foodporn
My review of Food Network Magazine
My wine indulgence
Brownie Making Day
Breakfast Casserole Recipe
My favorite Malbec wine
Death by Chocolate recipe
Iron Chef and foodporn
My review of Food Network Magazine
My wine indulgence
Labels:
#foodthanks,
blog action day,
Food Day,
foodie,
mom blog,
moms
Friday, October 14, 2011
Resin jewelry making challenges
I've been working on a new resin project using bottle caps. It appears as though the resin gods though I had forgotten the first rule of working with resin: the resin always wins. It doesn't matter how much I work with resin; I always have something MORE to learn about it.
Last I left you, I had glued artwork into the bottom of recycled bottle caps with the plastic inserts removed. Here's a few of the snags I've encountered:

This is a 'flat' bubble. Why it chose to get squished horizontally is beyond me. The zoom in my camera actually allows me to see that it's a bubble. If I look at it with my 'everyday getting older eyeballs', it looks more like a big piece of glitter reflecting light back.

I also had just the garden variety large bubbles as well. The first time this happened, I thought I hadn't checked the resin very well after pouring, so I triple checked with the next batch. Everything was good, yet when I came back two hours later, two of the bottle caps had bubbles. When I poured a couple of batches today, I decided to use my hot air gun instead of a straw to get the bubbles out. It got the bubbles out, but the force of the air also pushed up bubbles from under the paper. Apparently, I'm trapping air underneath the art which is escaping later.

I've also had a few with a lot of small bubbles. I don't know how this happened either.
So for the few that have turned out well, I have to look for cat hair. Thanks Karma.
To keep these mistakes from happening again, I poured a very thin layer of resin to cover the art. This should allow bubbles to escape easier in case they show up later. (I can always add another layer if I decide I don't like the thinness.) I'll let you know how that works out.
Monday, October 10, 2011
Our new babysitter (whom we just ADORE) is a recent transplant from Colorado to Florida. She asked the other day if this (picture at left) was an orange tree. I said it was then realized it would be fun to share more pictures of my lovely little tree since it had been awhile since I had shown the green golf balls.
It's a little hard here to get the perspective of the tree. He's probably about 8 feet tall and 6 feet wide. (The top gets lost in the oak tree behind it in this picture).
The oranges are now about the size of tennis balls. They might grow a little bit more, but not much.
The orange tree leaves are shiny on one side and dull on the other. The limbs have some sharp points too. I suppose the word would be thorns wouldn't it?
If this orange was orange and not green, wouldn't it be perfect just to put the straw in and suck it up??
As I was getting pictures, I noticed this orange was bursting with excitement. Literally. I've never opened up an orange this early, but it looks pale orange inside. Not quite appetizing yet.
These should all be ready for juice in February. Yeah!
Friday, October 07, 2011
The jewelry making books in my library
I've decided we all have something we hoard. I just try to hoard stuff that's worthwhile (at least to me anyway). In looking at my bookcase this week, I decided I am a jewelry book hoarder. I LOVE LOVE LOVE buying jewelry books. Designing jewelry. Making jewelry. Fixing jewelry. History of jewelry. and on and on and on. I love reading about 42 different ways to make the same bezel. I love looking at a piece of jewelry and trying to figure out how the artist made it. I love looking at others designs and wonder how I can make it better. *smile*
I have books on everything. Even stuff I haven't done yet. (but intend to sometime before I die)
You can learn so much just by reading. It's a great way of introducing yourself to techniques and sparking ideas in where you want to go next.
I've even got a few business planning books too. Reading business information is my other obsession.
I have a rule that all my books have to fit in one bookcase. As you can see, I make the most of all the space I can.

Sometimes the books don't even have to be 'how to' books. I love looking at designs from different periods in time and looking at the jewelry art of contemporary artists.
What jewelry books do you have on your shelf?
Tuesday, October 04, 2011
New resin project
What happens when you hoard stuff without knowing what you're going to do with it, only to find it years later and have the perfect idea?
Pure. Dumb. Luck.
I found this stash of bottle caps that I have had so long I can't even remember why I started saving them to begin with. Ah, another lovely way to capture resin.
I amaze myself sometimes.
So here they are. A lonely pile of bottle caps. They thought their days of being fun and interesting were over.
So this part was the biggest problem. How to get those little plastic inserts out of the caps? Otherwise, the papers wouldn't lie flat.
The answer: industrial strength acetone. Let it soak for a few minutes, then pull out with tweezers (which I was worried about putting through my hand at some point).
Here they are now -- nice and clean. Some of them got scratched getting the plastic out, but it's no big deal. It will be covered up by the paper.
I put cute paper in the bottle caps and sealed them like I do the scrabble pendants.
So what are these going to be? You'll just have to wait. :) That will be another forthcoming blog post.
Friday, September 30, 2011
My visit to Georgetown Cupcake
I had to go to Washington, D.C., for the day last week for a non-profit group I'm involved with. I had a couple of hours from the time my flight arrived until I needed to be at the purpose of my visit, so I met a friend for a bit of indulgence (and pre-event carbohydrate loading).

My friend picked me up at the airport and we went to Georgetown Cupcake. In case it looks familiar, this is the cupcake bakery from the TLC show "DC Cupcakes". Kinda neat how it looked just like it does on the show. We were both fortunate that we didn't have to wait in line long at all to place our orders. My only complaint is that there is very limited seating to sit and eat your cupcakes at the bakery. We got ours to go and went to a group of tables around the corner.

My friend got four cupcakes in a cute pink to go box. (She didn't think she could get away with going and not bringing any home to her family.) I had already forewarned mine that there was NO chance that cupcakes would be coming back on a plane.

So what did I get? I got the red velvet cupcake with cream cheese frosting. My take: the cake was good. Not great, but good. The frosting, however, was KILLER. Sweet, tangy, and perfect for the cake. I would definitely do this one again. (but who knows when that will be.)
Have any of you been? What is your favorite cupcake (from here or any of your other favorite bakeries)?
Thursday, September 29, 2011
Thornebrook Festival pictures
I am FINALLY getting around to getting pictures up from the Thornebrook Art Festival this past weekend. What I've been so busy doing the last few days will be in a few future blog posts.
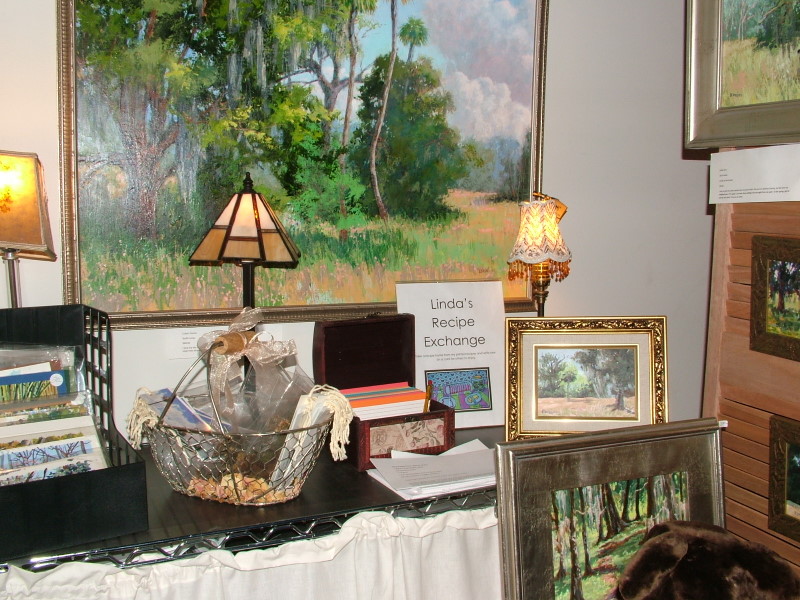
I completely revamped my booth for the festival. While the wooden boxes with the glass were very artsy, I desperately needed something I could easily handle myself. I used two folding tables and covered them with ivory tablecloths. I used risers to bring them up to counter height.
This festival also kicked off my once a year sale. You can see all the sale items in the basket on the right. (By the way, I'm working on getting more sale items on the KMS Designs website). Stay tuned.

The colorful wire flowers made another appearance. The picture doesn't really do them justice. The resin and pewter jewelry looked great on them and they made a nice pop of color on the table.
Isn't if funny how the scrabble tile pendants display nicely on the scrabble game racks?? The flowers and circles are the little foam sticker types that you can get at a craft store. They were a last minute addition to break up the whiteness of the table.

There was Halloween jewelry galore! Get your ghost on and be ready for the holiday.

The funny part for me? Not a single customer said anything about the new display. Here I worry and fuss over the little details and no one said anything. Not that I was expecting people to oogle, but I was a bit concerned that people wouldn't know it was me since I had changed the display. I suppose this also turned out to be an interesting experiment in human behavior. (Although several customers said they were looking for me in this spot. Sounds like location is more important that appearance.)
Overall, I really liked how the booth finished and it was MUCH easier for me to handle by myself. You will see this again at the Downtown Festival and Art show in November, but ramped up a bit more.

This festival also kicked off my once a year sale. You can see all the sale items in the basket on the right. (By the way, I'm working on getting more sale items on the KMS Designs website). Stay tuned.

The colorful wire flowers made another appearance. The picture doesn't really do them justice. The resin and pewter jewelry looked great on them and they made a nice pop of color on the table.


There was Halloween jewelry galore! Get your ghost on and be ready for the holiday.

The funny part for me? Not a single customer said anything about the new display. Here I worry and fuss over the little details and no one said anything. Not that I was expecting people to oogle, but I was a bit concerned that people wouldn't know it was me since I had changed the display. I suppose this also turned out to be an interesting experiment in human behavior. (Although several customers said they were looking for me in this spot. Sounds like location is more important that appearance.)
Overall, I really liked how the booth finished and it was MUCH easier for me to handle by myself. You will see this again at the Downtown Festival and Art show in November, but ramped up a bit more.
Wednesday, September 14, 2011
Resin jewelry pendant pictures
I haven't been making new pendants so much this week as I have been attaching the silver bails to the pendants I have made. Here's the assortment that will be at the Thornebrook Art Festival next week.
Birds. Pretty fall colors. My kids love birds. But I don't have cardinal pendants...yet anyway. Those are their favorites (mine too).
Geometric pendants. A neat little way to be funky without people thinking you've lost it.
Wow, almost looks like a tray of cookies. With sprinkles.
Still thinking cookies. Must focus on jewelry. No cookies until September 26.
There were three more batches of these. I hope I will be covered. I never know these things. All I know is that I will run out of one or two patterns and those won't be the same one or two patterns at the next show. (Note to self -- invest in a good crystal ball).
See you next weekend!
Monday, September 12, 2011
Preparing for Thornebrook Art Festival
My next art event is at the Thornebrook Art Festival, September 24 and 25. I've actually been getting inventory ready for the past month (including Halloween jewelry), so I just need to get my game on and get organized. I probably wouldn't be thinking about this too much at all, but for all intents and purposes, I'm going to be unavailable the week prior to the event. Yeah, I know that doesn't sound like a good idea, but an incredible opportunity with my other line of silver jewelry presented itself and I couldn't pass it up. I'll be out of town selling that jewelry almost the entire week before.
No worries. I'm getting ready this week and next. Here's what I have to do:
- Since I'm redoing the booth to make it as easy as possible for one person to set up and decorate, I need two new tables and two tablecloths. I might also go with some organza table covers. Not sure. Still thinking about that one.
- Since I have my only sale of the year in conjunction with this show, I need to get that jewelry packaged. It has worked out well to have that jewelry packaged and priced in a basket for people to sift through.
- I will also have wireless access in order to process credit card information at the show this year. That will be a big time savings and I don't have to worry about declined credit cards later.
- Of course, I need to get focused on having enough finished jewelry. That means that I had to be finished with pouring resin LAST week in order for me to finish it this week. I'm actually doing the best on this one.
Wednesday, September 07, 2011
Figs and #foodporn
With hubby working at the grocery store, I don't go very often. I'm grateful for that and after I stopped in this past Friday, he's probably thankful too. As I was loading up in the produce section, I noticed that fresh figs were in season. Woo hoo! I loaded up and surprised hubby that night with one of my favorite easy appetizers. (Sorry I shot our budget this week sweetie.)
Take fresh figs and cut off the top. Scoop out a bit of the center. Insert a heaping teaspoon or so of your favorite cheese. I personally like something pungent like a stilton or goat cheese. Wrap with a slice of proscuitto (did I spell that right?) and drizzle with some extra virgin olive oil. This also works well with a bit of camembert or brie (still not sure I'm spelling these correctly) and drizzle with honey instead if a pungent cheese isn't your deal.
Super. yummy.
Labels:
appetizer recipe
Thursday, September 01, 2011
The movie is never as good as the book
I knew better. Can anyone name me a movie that is as good as its book? (I can only think of one -- Cold Mountain -- that book was ghoulish to read) I was the only one up in my house the other night (working on resin jewelry of course) and I flipped through the tv channels. The movie "Angels and Demons" was just getting ready to start. Suck-er. Yeah, I'm a sucker for the Dan Brown novels. I absolutely LOVE his books and this one was a favorite.
I won't spoil the plot or anything here, but, the movie -- well -- it wasn't nearly as good as the book. So here's my one sentence movie review: "Read the book." Really. It's a fast read and you get more of the story (and it makes more sense).
What other book to big screen movies have disappointed you?
Labels:
Angels and Demons,
Dan Brown novels
Tuesday, August 30, 2011
MORE weird adventures in resin jewelry making
I wrote a post at the beginning of the month how I had this weird resin curing event happen. The resin "cured" on top, but slid off the pendant and oozed goo from the sides. At the time, I thought it was a one time event, so I didn't get to worried about it.
Apparently, I was mistaken.
When it happened a second time (only to one pendant), I thought maybe it was because I was at the end of the bottles of resin and hardener. Resin HATES water, so I thought maybe some condensation had gotten in and messed with something. I started new bottles for the next pour.
It happened again.
The entirely bizarre thing is that it's only happening to one (or this time two) pendants. I do remember that one of the pendants this happened to was one of the last ones to get poured and had more bubbles than the others. As a result, I had to spend a bit more time using the "straw method" to get out the bubbles. (Sorry, won't explain that method as I don't want to be responsible for someone hurting themselves. It can be dangerous if you don't know what you're doing.) I'm still thinking it could be excess moisture.
Arrgh. I obviously need to show some love to resin gods here soon.
Friday, August 26, 2011
How to Choose the Perfect Engagement Ring
This great little article came up in my google alerts the other day. Lots of times, these articles are just a big sales pitch, but this one has some very useful information. It's even helpful if your considering ANY jewelry purchase.
Enjoy!
How to Choose the Perfect Engagement Ring
Wednesday, August 24, 2011
How To Make Bottle Cap Jewelry Using Resin
I know I have a lot of resin jewelry making enthusiasts who follow my blog, so I'm always on the look out for useful jewelry making articles and videos to share. My google alerts let me know this video got added a couple of days ago and looked like a neat thing to share with blog readers. (Video is below.)
As I started watching it though, I found this video showed some techniques that, in my experience, may not result in success. So if you're going to watch, here are my comments, precautions and recommendations before you get started:
1. I have not personally used ICE resin (as the video shows), but I have heard mixed reviews about it. Research before you try it.
2. Use separate mixing cups when measuring the resin and hardener. That way if you overpour one of the components, you won't have to waste any. Pouring both into the same cup and not being exact means your resin won't harden correctly and you will be left with a gooey mess.
3. I like to pour the hardener (from its own cup) into the resin (in its own cup) in a slow stream while I'm mixing. I think you get a better mix and fewer bubbles that way.
4. I like to use my resin right away, even if there are bubbles. There is only a limited time you can use the resin before it hardens. I can always go back and get bubbles out.
5. I think there are safer ways of getting bubbles out of resin than using a torch. One of my methods involves using a hot air gun.
6. I would caution against drilling holes for findings BEFORE placing the resin the bottle cap. What happens if you change your mind and decide you want it to be a magnet? What happens if you place your art in there wrong and realize later that the hole isn't in the right place?
7. If I did decide to place a hole, I certainly wouldn't put the ring in the hole until after the resin has cured. If you spill some resin on your ring and you don't know it, your resin will cure and your ring may be in an unusable position. At least if you spill resin onto the hole, you can go back and drill it out later.
8. Use extreme care when pouring the resin directly from the cup onto your project. It tends to come out in big globs and will overfill quickly. (at least that's what happens to me)
All this being said, I think this video is a great inspiration for a future project!
Sunday, August 21, 2011
Resin jewelry I'm working on now
Maybe you'll believe me. Maybe you won't, but I'm already working on Halloween jewelry.
Seriously lady? Like the kids haven't even gone back to school yet??
It's all about wholesale and being ready for the Thornebrook Art Festival next month. I like being prepared rather than running around like the proverbial headless chicken (like I used to).
Here's what you'll see next month. They're not available for purchase yet, but email me a request if you see something you like. Enjoy!
Friday, August 19, 2011
Sterling silver filled wire
I know I have some jewelry making readers of my blog, and I'm curious. Have any of you used the sterling silver filled wire yet? What do you think of it?
Here are my experiences and I'm curious to know if you are having the same:
1. Harder than sterling silver
2. Tarnishes VERY quickly. I couldn't believe how quickly ear wires that have been sitting on my desk indoors (e.g. climate controlled) have gone from a clean, shiny metal to bronze colored. (like two weeks!)
3. Seem to be wearing as nicely as sterling silver.
How about the rest of you?
Labels:
jewelry making,
sterling silver
Thursday, August 18, 2011
Coffee Cup Shopping Cart Creator and Designer review
*Somewhere between Thankful Thursday and the Thursday rant......it's a shopping cart software review.*
If you've been following my blog over the last couple of weeks, you will remember that I've talked about upgrading my shopping cart system. After doing some research and talking to friends, I decided to give the Coffee Cup software system a try.
Full disclosure: I am NOT a paid spokesperson or am an affiliate for sales. This is just my experience on using their product.
First, I should probably say why I wanted to design this shopping cart myself. I talked to a web guy about doing it and well, let's just say it didn't work out. Multiple reasons why it didn't, and I don't want to discredit what he does, but I was disappointed with how long it was taking to get some of the features I wanted and I was going to have to give up more "control" of my website than I was used to. (The control was most important to me for tweeking SEO and such.) So I've been using the Coffee Cart Shopping Cart Creator and Designer (both Pro versions) for about 10 days now. Here's what I can tell you:
Good things about Coffee Cup:
1. You can download a trial of their software. This was a big deal to me. It would have been a lot less likely that I would have bought it if I didn't get to use that trial first.
2. Pretty affordable. Buy what you want (like an a la carte menu) and use it.
3. Their email support is very attentive. When I called their customer support line and they said I would have to pay for an appointment, otherwise I could email for free, I was skeptical. I was pleasantly surprised that I would usually have a response within a few minutes to a couple of hours. Even on the weekend. Pretty cool.
4. I can use the shopping cart system with Paypal Websites Standard (the free version). This one was a huge advantage. Most shopping cart systems charge you $30 a month and up, PLUS you have to pay for a merchant account monthly at $10 per month (or more).
5. You just pay for their software once and get free upgrades. (At least that's what they advertise at the present.) No additional monthly fees.
6. Really useful user forums. The staff and regular users of the product are pretty good at posting useful information in the topics forum.
Bad things about Coffee Cup:
1. I had to call my web hosting provider (Go Daddy) 6 times in a period of 24 hours to get several issues fixed. The issue was in the specifics of the servers my website was running on and the Coffee Cup software not liking those servers. Probably an over simplification of the problem, but basically, it was stuff out of my control and stuff that I had no idea was going to be a problem. Kind of annoying, especially since the last problem was an issue with the Coffee Cup software that Coffee Cup says was not their problem. (Many thanks to Go Daddy for writing me the patch and emailing me the file to upload to the server to get my site up and running without a bunch of errors.)
2. Everything is a la carte. You buy only what you think need, only to find out when you want to do something else, you have to buy the upgrade or a whole new program together. All of a sudden, what looks to be less than a $100 investment can turn into $300 to $400 pretty quickly. (Now of course as I write this, I see they are running a special on a bundle of the best selling Coffee Cup software programs. Isn't that always the case??? Buy something before it goes on sale.)
3. It's kind of a weird system. If you've never done web designing before, I would be concerned that it's over your head (even though it is the WYSIWYG system), but for someone like me who has used HTML editors, Frontpage and Dreamweaver to create websites, it was a bit annoying not being able to adjust everything like I had been used to.
So the bottom line, would I recommend it?
Well, I already started making sales with the new shopping cart, so something must be better from a customer angle or else it's pure dumb luck. (Either way, I'll take it.)
If you're thinking about purchasing it, DEFINITELY download the the trial versions first. I think if you have no experience with web designs, there might be easier systems out there (but maybe they cost more?)
Tuesday, August 16, 2011
Hen party at studio of Linda Blondheim
Here's some of my random pictures from my hen party at Linda Blondheim's studio on August 6. Thanks everyone who stopped by!
Scrabble tiles on their itty bitty racks. Just an assortment. (The snowflake pendant in the lower left was some wishful thinking on my part. It was HOT outside!)
Elvis did not leave the building with anyone. Surprising. I always sell an Elvis at every show. (until this one anyways)
In the couple of weeks before the event, I saved my mixing cups. I loved the assortment of bright colors it made. They look wet, but trust me, they're dry. (It's a good way too for me to check to see if the resin is curing okay.)
A close up of one of the cups. If it looks familiar, it's because I use dram medicine mixing cups. (Like the ones you get on top of children's liquid medicine.)
Now, I will show you some pictures from Linda's studio.

This is one of Linda's "mini" paintings. Fits easily on a desktop.
Linda's loft studio gives the feeling of your own living room. Very comfy.

She's got a nice assortment of sizes of paintings.
Linda also has a recipe exchange. Bring one, take one. Lots of good ones in there!

What shopping excursion wouldn't be complete without a bargain bin? Linda's got several paintings in her browse bin. Great way to start collecting her art.

There was also handmade soaps and knitting at the hen party.
More paintings. Lots of beautiful Florida landscapes to choose from.

This is the view as you go up the steps to her studio. It's in the back of the store.
A personal invitation awaits at the bottom of the steps.
And what event wouldn't be complete without some tasty treats!
It made for a perfect afternoon in the loft.
We all loved it so much we're doing it again! Mark your calendars for the Friday and Saturday before Thanksgiving, except this time there will be cake!
Details forthcoming....
Scrabble tiles on their itty bitty racks. Just an assortment. (The snowflake pendant in the lower left was some wishful thinking on my part. It was HOT outside!)
Elvis did not leave the building with anyone. Surprising. I always sell an Elvis at every show. (until this one anyways)
In the couple of weeks before the event, I saved my mixing cups. I loved the assortment of bright colors it made. They look wet, but trust me, they're dry. (It's a good way too for me to check to see if the resin is curing okay.)
A close up of one of the cups. If it looks familiar, it's because I use dram medicine mixing cups. (Like the ones you get on top of children's liquid medicine.)
Now, I will show you some pictures from Linda's studio.
This is one of Linda's "mini" paintings. Fits easily on a desktop.
Linda's loft studio gives the feeling of your own living room. Very comfy.
She's got a nice assortment of sizes of paintings.
Linda also has a recipe exchange. Bring one, take one. Lots of good ones in there!

What shopping excursion wouldn't be complete without a bargain bin? Linda's got several paintings in her browse bin. Great way to start collecting her art.

There was also handmade soaps and knitting at the hen party.
More paintings. Lots of beautiful Florida landscapes to choose from.

This is the view as you go up the steps to her studio. It's in the back of the store.
A personal invitation awaits at the bottom of the steps.
And what event wouldn't be complete without some tasty treats!
It made for a perfect afternoon in the loft.
We all loved it so much we're doing it again! Mark your calendars for the Friday and Saturday before Thanksgiving, except this time there will be cake!
Details forthcoming....
Subscribe to:
Posts (Atom)