Showing posts with label art show booth. Show all posts

Tuesday, February 07, 2012

Making fabric covered pedestals

Share |
Boy this post has been a long time in the making....

Once upon a time, there was a jewelry artist.  A jewelry artist who needed to create something splash for a booth at a wholesale art show.  She played around with some ideas and eventually came up with a booth involving pink, purple and green.  (Yes, those colors, but not necessarily in that order).  With the pink and green done, the last thing to accomplish was the purple.


I chose a rich purple fabric in bengaline.  I ended up spending more on the fabric than I wanted to, but I wanted to make sure I had something heavy enough to cover the pedestals and wrinkle resistant as well.


The cardboard pedestals I had already made out of cardboard boxes.  The white stripe around the top is a velcro strip.


Don't tell my home ec teacher mother, but I just eyeballed the edge and pressed down the seam with the iron.


I sewed down the edge.


Then I sewed down the edge with the other half of the velcro tape.


The velcro along the top sticks to the velcro on the box and presto! -- instant cover for the pedestal.  (And by the way, the boxes collapse and travel flat as well.)


Part two of this post will show you what they looked like at the ACRE Orlando show!


Thursday, November 17, 2011

Gainesville Art festival pictures

Share |
It was a beautiful and busy time last weekend at the Downtown Festival and Art show!  I enjoyed talking with so many people and getting the opportunity to help people with their holiday gift giving needs.  Here are a few random pictures from the event:

I painted bulletin boards to be used as display pieces for the jewelry.  I used those this time because I could load them with jewelry the days before the show then just hang them in my tent once I got there.

This time, I included a table out front for people to easily sign up for my mailing list.   I also had a basket of jewelry for people to peruse.

Once again, I went without glass over the jewelry.  It felt like I was 'nekkid' as I had used it for so long, but I think customers really enjoyed being able to see the jewelry without waiting for assistance.

This show also marked the debut of the recycled bottle caps with resin.  These cute little caps are the perfect refrigerator accessory.

I had more colors of the resin and silver pewter jewelry to show off.  I've been going a bit crazy with the colors lately.

While the earrings looked great on the colored flower trees, I displayed the pendants on the table. The displays looked a bit too crowded hanging on the displays.

I'm working on a video of the event too, to give you the 'full effect' of the weekend.  Thanks to everyone who stopped and shopped! 

P.S.  I'll be a Linda Blondheim's loft studio at Paddiwhack this Friday evening, 5:30 PM to 9 PM and Saturday noon to 4 PM.  Come and enjoy art, jewelry and Christmas cake!!

Wednesday, November 09, 2011

From bulletin boards to jewelry displays

Share |
I'm trying something new for my art jewelry booth this weekend at the Downtown Gainesville Festival and Art show.  Since I will be doing everything by myself this weekend (no hubby to help), I wanted something that I could easily set up myself.  Part of the plan involves repurposing bulletin boards that could become jewelry displays that I could prepare before the show and hang that morning.


I started with buying 4 el-cheapo bulletin boards.  These are 36 inches by 24 inches. I bought them online and got all four for under $100.


I got a garden variety off-white paint to coat the corkboard portion.  (Notice the small paintbrush in the lower left?  It is attached to a hand of a baby T-Rex dinosaur that insisted on helping me.)


This is what the board looked like after the first coat of paint.  When I came to check on it in a couple of hours though, the paint had soaked into the corkboard pretty well, so I needed a second coat.


You can see the difference here with a second coat of paint.  The lower left quadrant has had its second coat.


Once I let the paint dry, I put painters tape around the inside edge.  I sanded the frame so that it would soak up the paint better.


This is the orange frame after the second coat.

Unfortunately, when I removed the tape, it pulled a bit of the corkboard with it on one of the bulletin boards.  A little spackling compound and some more paint hopefully will keep anyone from noticing. 


This is a finished board.  I randomly put some squiggles on the board to give it more artistic interest.  The hardware will get applied tomorrow and I will take jewelry up Friday.  Then, all I have to do Saturday is to put up the boards.  This will save me a lot of time!

Wednesday, July 13, 2011

Outdoor festival jewelry booth design

Share |
In case you haven't noticed, I've missed a couple of blog posts in the last few days.  If having TWO batches of resin that didn't cure properly (mostly hard, but sticky like scotch tape when you touched them) wasn't bad enough, I've gotten the wild hair to redo my outdoor art festival jewelry booth.


This is my current booth.  It is composed of wooden boxes with collapsible glass boxes on top.  The boxes themselves don't collapse, but the legs do come off the bottom.  I get lots of great comments on it, so why change?

Couple of reasons:

  1. I don't think it fits the resin jewelry style.  I think this display is a good match for sterling silver and semi precious stone jewelry, but little too "snooty" for resin jewelry.
  2. It's a bit cumbersome to lug around.  For shows like the Downtown Festival and Art show, in Gainesville in November, where I can't set up until Saturday morning, there is no way I can set this up by myself in time for the show. 
  3. It's time for a change.
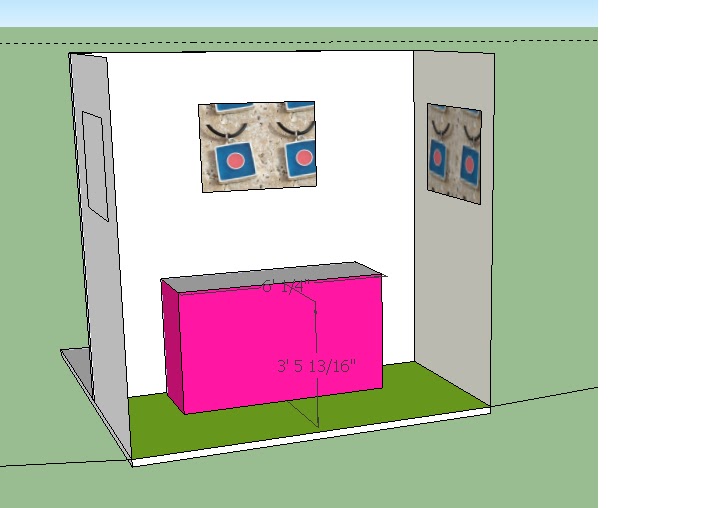
So here's what took me five days to come up with.  (Thanks to Google Sketch Up for the help.)


First, let me say, the wall and floor colors are a bit more "intense" than what I would say they will be, but you'll get the idea.

The floor is actually the brick road street downtown.  Unfortunately, it isn't as level as the picture shows.

The long table is 2 four foot tables put together.  It is draped with ivory tablecloths, with a table runner on top.  The table runner matches some jewelry display novelty items I got at Bed, Bath and Beyond a couple of months ago for my wholesale show.  The table runner is ivory with a few large flowers on it.

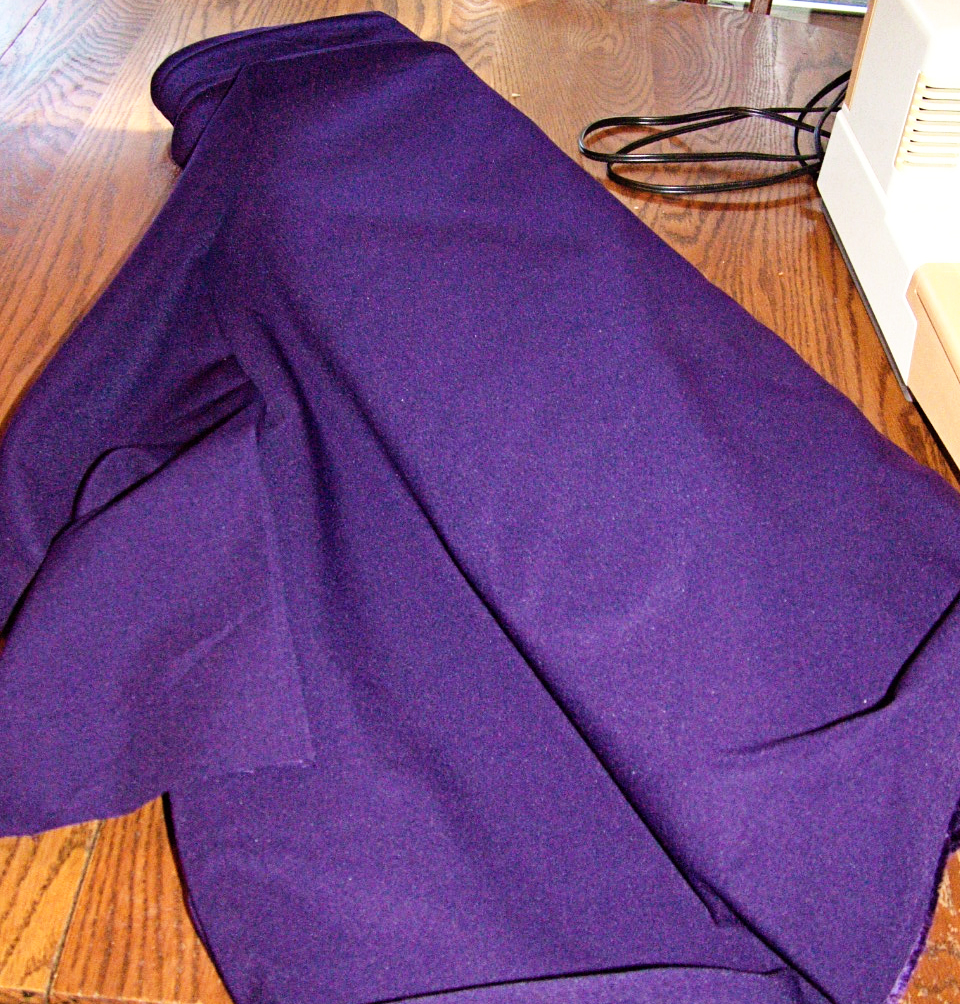
The walls are going to be a sheer drapes in the aqua color.  My hope is that they will give enough color without feeling heavy.

The three hanging wall items will be jewelry displayed in a frame at eye level.

So you might be asking, why not go over the top color like what I did with my wholesale art jewelry booth?  I did think about out.  Really, I did.  All I can say is now I understand why fashion designers put out the big over-the-top fashion pieces -- to grab attention.  I think the wholesale booth does a great job of drawing business and art gallery owners in and making it crystal clear that my jewelry is about fun and color.  I'm a bit concerned that the same "over the top" approach to retail customers may be too much.

What do you think? 

Monday, May 16, 2011

Jewelry pictures for my art show booth

Share |
Last Monday, I showed you pictures of jewelry that would end up hanging in my jewelry booth at the ACRE Las Vegas show.  I ordered plastic poster clips from Displays 2 go to hang them with.


If you look at the top of the picture, there is a clear clip.  I put the picture in and clip it shut.  There is one to go at the bottom as well, although I didn't put it on the picture.

I didn't get them all out to try (I may regret that later), but just went ahead and packed everything away.  My fireproof fabric is in transit, so I hope to have pictures to show of that by the end of the week.

Monday, May 09, 2011

Photographing resin jewelry

Share |
This past Saturday, I ventured out midday to photograph some of my resin jewelry to be used as a photo enlargement to display on a wall in my art show booth.  The idea is that customers and art gallery and boutique owners can see the photographs from a distance and will be at least intrigued to come into my booth.


I made my own light box by cutting out the sides and top of a cardboard box and replacing the cutouts with white computer paper, which serves to diffuse the light.  The background is a white to gray to black photogradient paper.  This is an industry standard when photographing anything for show entries or magazine advertisements.  (Kind of like that brown/gold background when you get elementary school pictures.)  I used a piece of aluminum foil to reflect light back onto the piece of resin jewelry.


So here are the finished pictures:


Per some other artist recommendations, I am getting these printed at Costco (in a 12 inch by 18 inch size), and will hang them with poster clips.  The Costco price for printing was very affordable, so I'm hoping the pictures will turn out well too.

Wednesday, March 30, 2011

Jewelry displays

Share |
Now that I've got one wholesale show under my belt, I've gotten a pretty good idea about what I want to do for my next wholesale show in Las Vegas in June.  One of my plans is to make my own floor standing pedestal displays made from cardboard and medium density fiberboard (MDF).  I'm not necessarily a do-it-yourselfer, but I weigh the cost versus the time.  In this case, I figured I could get 4 to 6 pedestals for the price of buying one if I did it myself.

My research led to the websites of several large home improvement stores.  I found the MDF I wanted and it came in a 4 foot by 9 foot size.  "Great!" I thought to myself.  That will definitely be enough.  Got my wood working buddy to agree to cut it to size for me, so off I went to Lowe's.


When I got there, I asked for help finding the said 4 foot by 9 foot MDF.  As the very nice men at Lowe's took me there, I had this, "Oh my God, what was I thinking moment".  How the heck did I think I was going to get this home in my vehicle????  (Notice said piece of MDF in the picture.  It's huge!)

I looked at the two Lowe's guys and asked, "Can you guys cut this?"  In a rather confident, respectful tone, one of them answered, "Ma'am, we're Lowes."

Yeah, I should have know they could do it.


So the very nice sales associates at Lowe's cut up my MDF (and thought I was a whack job for taking pictures too).


In the end, I have enough pieces to do 6 pedestals.  Next on the to do list for this project is to order the cardboard. 

Stay tuned......


Monday, February 28, 2011

New jewelry booth display

Share |
I'm working on a new jewelry booth display.  I'm trying to kill multiple birds with the same stone, but finding out that I might be killing my neurons instead.  The cool thing I found in all this is a program called Google SketchUp.  It allows users to create three dimensional images of what they're trying to design.  Very cool!  It actually has been a big help in trying to help me visualize what I can do.

So before I show you what I've designed so far, let me share with you what I'm trying to accomplish:

  • My jewelry is bright and colorful.  I want people to get that impression when they see my booth.
  • I consider my jewelry more "fun" than heirloom, fancy, or special occasion.
  • This is for an indoor booth display 10 feet wide by 5 feet deep.


This is OPTION 1.  The table is approximately 35 inches tall, 6 feet wide and 2 feet deep.  There is 3 feet from the front of the table to the front of the booth.  Yes, that's a hot pink cloth on the sides of the table and ivory on top.  The floor is meant to be a lime green.  The walls are ivory with pictures of my work hanging on them.


This is OPTION 2.  Same dimensions, walls and floor colors.  The same pink table exists, except with a black cover.  There are also two 44 inch tall by 14 inch by 14 inch pedestals on either side of the table.  They are purple, with black tops.  (I tried turquoise as well, but I liked the purple better.)


Comments on which one you like better?

Monday, November 08, 2010

Setting up an art show booth

Share |
I spent this past Friday afternoon getting ready to sell jewelry at the Gainesville Downtown Festival and Art show. I thought it would be fun to share with blog readers just how an art show booth comes to fruition.


This is the stack of my tent pieces and display boxes.  The tent poles are on the shelf on the top part of the picture.  The wooden boxes in the bottom  part of the picture will serve as display pieces. 


This is our '98 Ford Explorer loaded down with the art show tent and associated materials.  The front passenger seat is also full.  There is only room for the driver (barely).


This is my booth space.  When you set up at an art show, all you get is a space.  The show management doesn't provide you with anything to show your work.  (and yes, it was dark when we got started).


This is the top part of the tent.  In the next step, a canopy was placed over the top and hooked to the frame.


The top has been lifted with polls and hubby is busy putting up the sides of the tent.


The sides are up and the brown boxes have been set up.  We're now in the process of setting up the glass boxes on top of the wooden cases.


This is what the finished booth looks like.  Notice there are also red drapes on the front and a banner hanging from the back.  The jewelry is also in the cases.


It takes about 2 hours to set up the entire booth, with the jewelry, and about an hour and a half to break everything down.
Related Posts with Thumbnails