Monday, August 30, 2010

Pouring resin jewelry pendants

Share |
 While I was getting ready to pour resin jewelry a couple of nights ago, I though I would grab a few pictures. 

Resin always starts as two separate parts.  When they're apart, they're completely inert.  Once they are mixed together though, a chemical reaction starts and the mix eventually hardens.  The cups at left show the measured resin.


Here I'm mixing the two parts together.  It is important to wear gloves.  I also use disposable cups and wooden toothpicks.


This shows my digital art affixed to the scrabble tiles.  They are placed on a layer of wax paper in the case that some resin rolls off the pendants, it won't stick to any thing permanently.

For these pendants, I have to drop on the resin to each pendant individually with a toothpick.  I have to work quickly as I only have about 15 minutes before the resin starts to get too firm to work with.


Once I have placed the resin on top of the jewelry, I cover it with a dome and allow it to harden.  It takes approximately 3 days for the pieces to fully cure.  Once they're done, I can adhere the bails to the back.

Friday, August 27, 2010

The view from my art jewelry office

Share |
So I thought it might be fun to show you what my office looks like. My office is a separate room inside my house. I would one day LOVE for it to be in my studio, but alas...another day. I'm not a neat freak by any stretch of the imagination. I use a lot of "piles" to organize, but am slowly switching over to using file folders and organizing racks. Perhaps I can get some help in this someday. This is my computer desk complete with laser printer to the left. I use the printer to print out the images for some of my resin pieces. The laser printer was so much more expensive, but I am so much happier with the print quality.


I've had to expand to buy a couple of shelving units to store jewelry making materials.  Before making resin jewelry, I always kept everything I could in my art studio.  Since resin can be a bit fussy about the weather, I keep a lot of those materials indoors.  The picture at left shows a hodge podge of papers and materials.  If you look closely at the 4th shelf down on the right, I've actually got resin jewelry pieces curing under the plastic container "domes".


This shelving unit contains gift boxes and packaging materials.  You can see the 3rd and 4th shelves down contain packing envelopes and boxes complete with a postal scale.


A closeup of some of the scrabble tile pendants in process.

More digital art papers waiting to be applied to scrabble tiles.  I keep them inside as well since I can keep the dust down in my office better than in my studio.


I promise one of these days to get my studio cleaned up enough for a tour there as well.  *smile*

Wednesday, August 25, 2010

Pictures of my local bead shop

Share |
 I took my new silver earrings class examples by Gifts of Avalon, Gainesville, Florida, on Monday.  Since I know I have readers from all over the world, I thought it might be fun to post some pictures and hear comments about how this bead store is alike or different from yours.

They always have a large rack of books available for purchase.  The latest beading magazines are usually there too.


 There is a HUGE selection of beads!  Shoppers can purchase them as singles, strung, or as "hanks".


The glass counter here has the class examples for the upcoming months.  I'm not the only who teaches jewelry making there.  There are several other local jewelry artists who teach bead weaving, glass fusing and other metalsmithing techniques.


Gifts of Avalon also has a nice selection of semi precious stone beads.  There is a nice assortment of colors, shapes and sizes.


A closeup of of some turquoise, sugilite, jasper and coral beads.


How can you make beaded jewelry without metal findings?  Trick question!  This is a picture of some of the large trays of copper and bronze beads.  There are sterling silver beads for sale as well.


 Sometimes store owners, Trude Spillane and Rhonda Bergman, buy beads in bulk.  They will repackage them into smaller containers for sale at a bargain price.


Currently, Gifts of Avalon does sell beads and jewelry making items on their website.  There store has a lot of inventory, so I would even recommend you to call if you don't find what you're looking for on their jewelry store site. 

Does this look anything like your favorite bead shop?

Monday, August 23, 2010

Metal jewelry making class examples

Share |
I teach a jewelry making class at Gifts of Avalon, Gainesville, Florida, once monthly. My students are always pushing me to come up with new class ideas. For my class on October 4, I am showing students how to create a crimped pattern in both metal sheet and wire. The class examples are shown here.
No experience is necessary to take these classes.  Students only to need to pay the class fee.  A materials allowance is included with the class registration.


I teach students how to use the equipment we need for the project.  The store generally offers a discount to equipment purchases made on the day of the class.


I teach classes that don't require a torch.  There is so much to jewelry making that students can do without needing to use heat.


I also like to teach short, evening classes.  I think students have the best attention span that way and tend to get less frustrated.


Is there something you would like to see me teach?  I'm always open for suggestions.


Friday, August 20, 2010

Questions to ask at an art show

Share |
As I'm busy preparing for the fall art shows, I am also keeping in mind what customers have wanted in the past or could potentially have a need for.  There's more to selling jewelry than just selling the jewelry!  One thing I try hard to do is to answer questions from art enthusiasts and take the opportunity to educate them about my artisan jewelry.  It actually got me thinking about questions I WISH people would ask.  I certainly don't want to overload people with information about my resin jewelry if they don't want to hear it, but I do love to talk about what I do.  I brainstormed a few questions that I believe someone could ask any artist at an art show or gallery opening and hopefully get some thoughtful responses.

  • What inspires you?
  • What is your technique?
  • How is your art different from other artists?
  • How did you get started?
  • Can you take me step by step through a piece?
  • Why do you do your art?
  • Why do you do this particular kind of art (or use this particular technique)?
  • Can you describe your creative process?

Along the line of what to ask, I would like to share with art enthusiasts one question not to ask:  "Did you make this?"  I realize that may seem like a perfectly innocent question on a shopper's part, but it's one that artists are asked MULTIPLE times during an art show or opening. Artists tend to take that question as "Of course! As opposed to my little gnomes or slave labor?" A better question would be, "Are you the artist?" if you are unsure if the person you are talking to actually created the art.  (Just a suggestion to get the conversation off to a good start.)

There are certainly others that I get asked that I'm happy to answer as well.  What other questions would you like to add to this list?

Wednesday, August 18, 2010

My visit with a local painter

Share |
 I spent the afternoon recently with Florida landscape artist Linda Blondheim.  Linda and I get together every 6 months or so to talk the business of art.  It's nice to be able to compare notes with someone that's not in my media.  We can discuss what's working and what's not working.  At the end, we always have an actionable plan to work on.  We'll report back to each other in a few months to see how our plan is going.

I met Linda at her studio which is about 10 miles north of Gainesville.  I fully admit that I have studio envy!  Linda's art studio is the perfect place for her to paint.  What I love about it is that her art studio is a separate, climate controlled, quaint building that she can completely call her own.  I long for the day that I can have a studio that's not part of my house and that I don't have to worry about little people inadvertently destroying something!  I took some pictures from my visit to share just what Linda's painting life is like.  You can see here at the easel she has a work in progress.  Linda blogs about her paintings and how she artistically works through them.


Her supplies are always organized and make sense.  You can see here how her brushes and paints are within easy reach of her easel.


I wandered around her studio grabbing pictures of her latest Florida landscape oil paintings.  I love how she is so exact with her interpretations.  As she explained to me, "I like people to experience a 'vacation', at least for a few moments, when they view my paintings."


Linda is taking notes about our conversation while I grab some pictures.


Linda is ALWAYS the best hostess.  I have never been to her studio without being treated like a special guest.  This day was no different.  A lovely plate of tea sandwiches and fruit awaited me.  She joyfully recalled how this was a part of her southern hospitality upbringing.


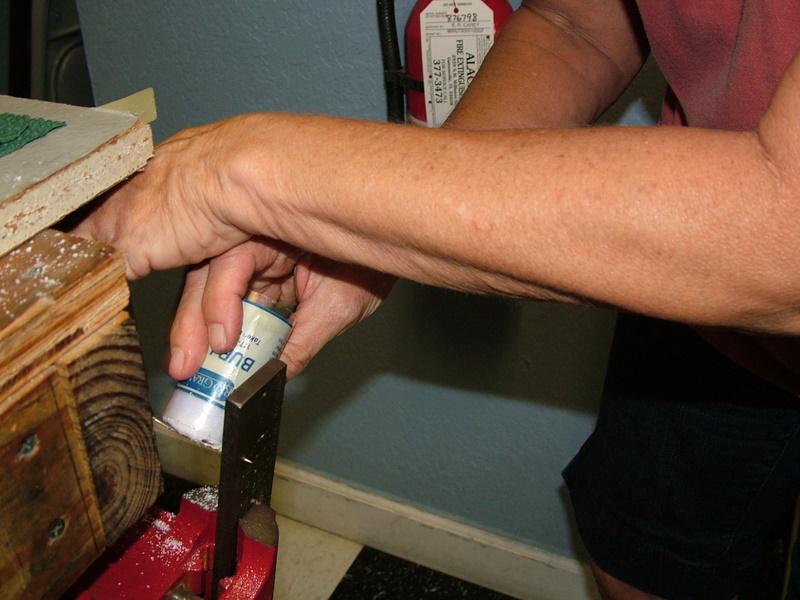
Linda always has a selection of paintings tastefully framed and ready for hanging.  I'm always impressed that she carefully considers the frame before putting the oil painting in it. 


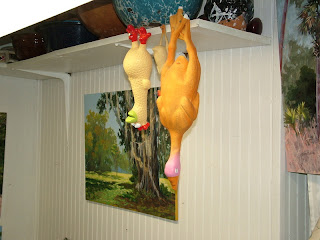
These rubber chickens grace her studio as well.  I'll let her tell you how they got there.  *smile*


Linda does several paint outs during the year along with painting on location.  I think that closeness translates into her landscape paintings.


 I just couldn't stop taking pictures!  (and I certainly couldn't choose only one or two to post)


Linda also receives visitors to her studio.  She is very gracious and enjoys the time to connect.


This is me and Henry, Linda's studio dog.  Henry is a French Bulldog and is always happy to visit as well.  He is quite lively and Linda is aware that I like visiting with Henry as much as I do with her.  He accompanies her on trips and has even made a paint out or two.  Not much gets past him!


I look forward to my next visit!


Monday, August 16, 2010

A day in the life of an art jewelry maker

Share |
I don't really know how typical my day is compared to other people.  I'm sure for moms out there that are trying to balance a career and family life, much of what I say here will sound familiar.  I get questions form art enthusiasts and patrons just how I manage to get done what I do.  Here is my typical day:

Up between 5 AM and 6 AM.  With any luck, my kids aren't up yet.  If I manage to get to bed at a decent hour the night before, it's closer to 5 AM.  My list of things to get done in the morning before 7 AM is:

  • Read and respond to emails
  • Read my google alerts
  • Read the blogs I follow
  • Package orders and prepare them for mailing (to hand to hubby to mail on his way to work)
  • Post updates and make changes to my jewelry gallery website, KMS Designs
  • Write blog posts for this blog and my other jewelry blog, Handmade Resin Jewelry
  • Use Hoot Suite to get my tweets ready for the day.  (I like to tweet live, but when I find good articles, I like to schedule them to go out all during the day instead of one big lump.)
About midday, while my kids are napping, I used to pour resin.  Now that my oldest two (three and a half year old twin boys) are outgrowing the need for a nap, I don't attempt it.  Since once it's mixed, the resin is "use it or lose it", I can't be distracted.  Instead, I work on projects that I can start and stop as needed.  This is what I attempt to accomplish:

  • Seal papers for resin
  • Photograph jewelry (weather permitting)
  • Upload new pictures to my Facebook and Flickr pages.
  • Prepare metal pieces and settings to have resin included in them later

After my kids are in bed (about 9 PM or so during the summer), I get back to work.  I'm up until 10 PM or possibly as late as midnight.  The later I go to bed, the later I start the next morning (although it's not really sleeping in...)

  • Pour resin
  • Sand, polish and drill resin pieces as needed
  • Assemble finished resin jewelry components
  • Make website and blog updates
Of course this all isn't set in stone, but it is a good guideline.  My husband is good enough to watch the little peeps on Sundays to allow me to get more of the business side of things done and spend some good time with the torch.

So for all you moms out there, how else do you balance work and family life?

Friday, August 13, 2010

Grilling pizza

Share |

Dinner at my house gets to be a battle between gourmet and something 3 small children will eat.  One menu choice we all can agree on is a grilled pizza and a salad (at least for me anyway).

My husband also prefers his pizza this way.  I thought I would share how I like to grill a pizza.  (Not an exact science, but you'll get the idea.)

Get some pizza dough.  I suppose you could make your own, but I just get a ball of it from my neighborhood grocery.  I like to let it sit out all day if I can.  It rises much better.

Spread it out into a pizza crust shape.  I usually end up pulling on the dough and letting it hang from my hands to stretch it out.


Preheat your grill on high for at least 5 minutes.  Once this is done, put the pizza dough on and turn it to low.  After about 3 to 4 minutes, flip the dough over with BBQ tongs.  It should flip over firmly.  If it still wants to "stretch", it needs a little more time.

I brush the freshly grilled side with olive oil and a couple of cloves of crushed garlic.  Then, I add an assortment of cheeses, usually white cheeses like parm, mozzarella and asiago.  I let the cheese melt about 3 minutes, then I add on my other toppings.  This night, I just did some roma tomatoes.  I let the pizza grill another 3 to 4 minutes.

Pull off your pizza (you can check the underside to see if it's done) and add fresh herbs to your liking.  We're not red sauce fans in this house, but I serve it on the side for dipping if anyone wants it. 

I usually do this recipe in this house a couple of times a month.  Enjoy!

Wednesday, August 11, 2010

Scrabble tile jewelry in progress

Share |

 I have been concentrating on the Scrabble tile pendants over the last couple of weeks.  The early comments from my customers and wholesale accounts have been positive, so I have been focusing on them.


As I was working on them yesterday, I loved how the random assortment of them on my tray looked like art itself.  I've been having fun working with different colors, patterns and simulated textures.


This is just a preview of what's to come!  Stay tuned.

Monday, August 09, 2010

Making resin jewelry bracelets, Part 7

Share |
(Read part 1, part 2, part 3, part 4, part 5, and part 6 of the resin jewelry making process)

Now that I've got the individual pieces sanded and drilled, it's time to assemble and polish the pieces.


These are the bracelet links I'm going to use.  It's just a random, complimentary assortment of the links.


I line them up in the order that I like.  For the most part, it's random, but I try to make sure I don't have all the same paper patterns next to each other.  I try to mix it up.


 I thread my stretch plastic cord through the holes.  Remember how I was being so  particular about making sure the drilled holes were free of shavings?  This is why.  I can't thread the plastic through if anything is in the way.


I have the first set of holes threaded.  Now I go back and do the second set.


Once I have the cord strung through both sides, I tie a square knot into each piece.


After trimming the ends of the cord, I give the bracelet one last good shine with some wax. 


This is it!  Can you believe it's finally done?


So here's the question I need answered from fans and visitors:

After seeing the posts on how to make this bracelet and seeing the finished resin bracelet above, what would you expect to pay for a piece of art jewelry like this?

Friday, August 06, 2010

Getting a jewelry appraisal

Share |
I don't do jewelry appraisals, but sometimes I get questions from my art jewelry customers about getting their jewelry appraised by a professional. Having a appraisal done of your jewelry is a good idea because many homeowner's insurance policies will not cover the full value of your jewelry if it's lost or stolen.  I refer people to the article, Appraising Fine Jewelry, which covers the basic details of what you should have appraised, who you should get to do it, and what you can expect it to cost.  Once you have the jewelry appraisal, you can then get a "rider" to your homeowners' insurance policy, which will provide the extra coverage needed for your jewelry.

Wednesday, August 04, 2010

Jewelry making class projects and pictures

Share |
I had fun teaching a new class a couple of nights ago at Gifts of Avalon.  I taught jewelry makers how to use a draw plate to gradually draw down the diameter of their wire to make a brooch.


The first thing people had to do was file the end of the metal into a long point.  This is important to get it through the draw plate.


You stick your piece of wire into the first hole where that pointed end gets "stuck".  The next step is use the draw tongs to pull the piece through.  This makes the diameter of the wire smaller, but makes the piece longer.


As I mentioned a few times over the course of the evening, "lube is your friend".  The lubricant helps the wire guide through the draw plate easier.


After class participants created their free form design, they could selectively hammer parts to give it some dimension and visual interest.


I am always amazed in class at just how creative people can be!  Take a look at the finished class projects:


Claudia is modeling her brooch.


Claudia's brooch close up.


Kathy's brooch!  (You saw her filing earlier in this post.)  An admitted jewelry making novice, but quite an excellent first try!


This is Judy's artsy brooch.  Drawing wire was not quite her game that night, but I think she liked it better than sawing sheet metal.


Jill's brooch with a pearl.  It arches up in the middle and is really quite elegant.  I think the pearl adds a lot.


Chrissy also chose to model her pin.  Another newbie effort and success!


Sharon was also a new one to my classes.  Her abstract pin goes with her blouse pretty well.


Last but not least is the (other) Judy's pin.  Judy did not have the kindness of the "jewelry karma" bestowed upon her for class.  Part of her piece broke midway through class, but she pulled it together to create a very nice pin.


I don't currently have any classes scheduled for September and October, but I hope to have something on the calendar soon.  Keep tabs on my classes page to know the latest.
Related Posts with Thumbnails