

Monday, September 13, 2010
What's your favorite TV show?


Friday, September 10, 2010
How I got started making resin jewelry
For anyone that has followed my art jewelry and jewelry making career for any period of time knows that I haven't always made resin jewelry. My career started in 2001 when I finally had the chance to explore my jewelry making skills. I took a class with local jewelry artist Susan Chastain. Susan and I became fast friends and she very generously continued to teach me jewelry making skills.
My first few years of jewelry making involved a lot of semi precious stones and minerals. I started off making a lot of jewelry in Susan's style: rustic, organic, a bit vintage, and very traditional. It was definitely something you wouldn't find in the latest fashion magazines. I didn't want anything to do with the day's fashion trends.
In the summer of 2003, I took my first jewelry making class at the Penland School of Craft. I learned granulation under Doug Harling. Doug was another huge influence on my jewelry making career. Doug's specialty is granulation jewelry. He taught his technique (and taught me some non granulation techniques as well). The granulation process was quite different than anything I had ever done. The other exciting thing about granulation was that few other jewelry artists were doing the technique. I was able to do something truly unique.
As much as I loved the granulation technique, one of the challenges is that it uses "purer" metal than I had used when doing the other style of jewelry. I must use fine silver (100 percent silver -- sterling is only 92.5 percent silver) and high karat (18 to 22 karat) gold. This was fine when the metals market was low, but once the economy took a downturn, precious metal investing became more popular and significantly raised metal prices. Between the high prices for this kind of metal and the economic uncertainty, creating granulation jewelry wasn't economically feasible for me anymore.
I had been studying resin jewelry for awhile in books and magazines. It interested me, but I hadn't had a chance to experiment with it yet. In the summer of 2006, I was able to return to the Penland School of Craft to study resin jewelry making with Heidi Schwegler. While her class lacked in the practical application of making wearable resin art jewelry, I was grateful to finally have the opportunity to learn the basics. I got to work with silicone, epoxy and polyurethane resin. I learned some basic skills and it definitely made me want to work with it more.
I'm still evolving with my resin jewelry, but love the journey. I've been working exclusively with resins for only a year now, but am excited about where I might go next.
 | |
| Sterling silver, reticulated sterling silver, bronze, chrysocolla Pin/pendant Circa 2003 |
 | |
| Fine silver granulation, fresh water pearl, Circa 2005 |
As much as I loved the granulation technique, one of the challenges is that it uses "purer" metal than I had used when doing the other style of jewelry. I must use fine silver (100 percent silver -- sterling is only 92.5 percent silver) and high karat (18 to 22 karat) gold. This was fine when the metals market was low, but once the economy took a downturn, precious metal investing became more popular and significantly raised metal prices. Between the high prices for this kind of metal and the economic uncertainty, creating granulation jewelry wasn't economically feasible for me anymore.
 |
| Sterling silver, colored epoxy resin, 2010 |
I'm still evolving with my resin jewelry, but love the journey. I've been working exclusively with resins for only a year now, but am excited about where I might go next.
Wednesday, September 08, 2010
Getting ready for art shows
I can't believe the summer is over! Maybe it's just me, but it seems like it flew by this year. As it turned the first of September last week, I realized that the Thornebrook Art Festival is next month. Wow! It's my first of my two art shows this year. I used to do a lot more shows (about 8 or 10 every spring and fall), but for several reasons, I just don't do that many anymore. I only do my local shows now (at least for the time being), to allow me to be closer to my family.
As I started thinking about everything I needed to do to get ready for this show, I thought about how I used to run around like the proverbial headless chicken trying to get things done. Whether I'm wiser or less stressed, I don't know, but here's what I've learned:
 |
| KMS Designs resin and acrylic jewelry art show booth |
- I will always run out of something.
- People come to look, learn and enjoy the conversation. They don't want a sales speech. (Good thing, I don't like giving those.)
- I like people to try on my jewelry. It gives me ideas on what to do next.
- Art festival food is a lot like carnival food, crunchy, a little greasy, and glad I only have to eat it a couple of times a year.
- I can break down an art show booth like I'm on fire. :)
- I can fit more stuff into a 90's model Ford Explorer than anyone ever thought possible.
- Location, location, location. Important to setting up and getting customers.
- Ninety-eight percent of people who come to art fairs and festivals are nice and mean well. I won't comment on the other two percent.
- I am glad I invested several years ago the thousand dollars to get a sturdy tent. It has put me at ease on several bad weather show days.
- I will always need to use the bathroom when I have no one to help me and can't find a booth sitter.
Monday, September 06, 2010
10 reasons to visit the Downtown Art Festival in Gainesville, Florida

- Get a jump on your holiday shopping!
- You won't find a bigger selection of handmade arts and crafts anywhere around Gainesville
- The jazz festival! The festival includes local jazz musicians who wow the crowd with their skills.
- There is plenty of room to walk and enjoy the art. (I've done some shows on side streets where people had to elbow their way through the crowd.)
- Get a chance to mingle with some artists. Where else do you get the opportunity to ask questions of so many artists in so many different types of media?
- It's free to enter! It's an art museum for the weekend.
- Experience a culinary trip of sorts. Whether you're looking for a lighter fare, or the typical fried and crispy treats, they're there!
- The weather is (almost always) perfect.
- Enjoy a dinner downtown at one of the many great restaurants in the area after the show closes at 5 PM.
- Support your local economy! Approximately 30 percent of the artists are from Alachua County and another 30 percent are from Florida. Help your own community.
For anyone interested in seeing me and my resin jewelry for the weekend, I'm at booth 80 (across from Emiliano's). The show runs 10 AM to 5 PM both days of the festival.
P.S. If you want an email reminder about the show, join my email list.
Friday, September 03, 2010
Resin Bracelet - How to Make resin jewelry
In the process of reviewing my google alerts this week for resin jewelry, I found this cute little video on resin jewelry making. While the video's star, Jennifer Perkins, does things differently than I do, I think viewers can watch it and get a great perspective on making resin jewelry. Maybe you will be inspired to make your own!
Wednesday, September 01, 2010
Art Appreciation 101
I found a great little article the other day on art appreciation. I thought it would be a good read for anyone wanting to learn more about viewing and appreciating all forms of art.
 I DON'T KNOW MUCH ABOUT ART BUT I KNOW WHAT I LIKE?

Perhaps you've gone to a gallery or art museum, looked at the artwork displayed and said to yourself, "What the heck is that? I can't understand it! Why is this here in a gallery?"
Or, maybe you've gone to a gallery or art museum and your reactions was, "Wow! Great stuff! I like this! I don't know why, but I do!"
Or, maybe you've gone to a gallery or art museum, and, after viewing the exhibits, you walk away feeling bored and disinterested. You may have said to yourself, " Why do I bother with looking at art? I never understand it. It's beyond me."
Like any other discipline, art requires the viewer to be knowledgeable about the information it presents. Sometimes we think we should just automatically understand art. After all, there it is, just hanging there on the wall and all we have to do, we think, is just look at it. But do we really SEE it? Often, our response may be, "I don't know much about art, but I know what I like." That is just another way of saying, "What I like is really just based on my ignorance."
THE MORE YOU KNOW, THE MORE YOU CAN ENJOY
Liking a certain artwork is a pleasure. You have communicated with visual phenomena and really enjoyed the experience. It can be a very enriching, rewarding experience to know how and why an art form developed or have some knowledge of how and why an artist works in a particular way. More than likely, your perspective is quite limited if you have never studied art or know how it has developed in not only, our Western culture but all over the world. What if you could gain information on the many forms of art that have been produced since humanity began, and how it developed over time to the present day? What would this kind of study mean to you? It would mean that, equipped with that knowledge, you would be able to enjoy a lot more art!
Here's why.
The more you know about art and its development, the more you can enjoy looking at art! You will see much more and understand the context, content and style of the art form. And this is the basis of Art Appreciation-a study of how to expand your knowledge of the art world, past, present and future and, with that perspective, be able to communicate with the rich visual/creative world!
HOW TO BEGIN
So, how do your start gaining knowledge of this vast art world? Where do you begin?
Begin by dipping your toe into Art History. With a basic Art History 101 knowledge you will be able to see how art, as we know it, was not really a term until the science of Art History was developed in our western culture. And, when it was developed, as you can read in many art history books in the library, art has existed as long as humans have been able to pick up a stick, brush or chisel and record their lives and experiences.
There are several ways of learning how to appreciate art:
ONE -- Learn about the basics of art history. How art developed, from the Lascaux cave paintings to modern art today. Older art history books deal primarily with artistic development in Western culture. Newer books add developments in Asia, China, Russia and the mid-East. The study of Art History has, over time, become global. In learning the time lines and factors that produce new perspectives and styles in art, you will not only gain a new historical perspective, but also become acquainted with the various art forms produced over the past centuries.
TWO--Choose a certain period or style in art history and learn about it. Perhaps Impressionism interests you. Or maybe you've always wanted to know the difference between Op Art and Pop Art. Through studying the cultural impact of a certain style on a specific period in time, you can understand why that particular art form developed and appreciate the artwork in a broader context.
THREE--Take a tour of your local art museum. Museums offer a wide variety of art educational programs and tours of their exhibits. Or travel and see the actual art in its setting. There are many websites on the Internet listing global art tours and travel, often by geographical location or specific art and architectural styles. On site art tours offer a unique and interesting way to travel and can give you an intimate, one on one perspective with the historical art and culture of the area. Tour groups are generally small in number and conducted by very knowledgeable guides delighted to respond to all of your questions and comments.
FOUR-Visit your local art galleries often. Galleries are supportive of their artists and gallery owners and attendants are usually quite pleased at your interest in their exhibits. They will be glad to give you information on the artists, such as whether they are local, where they have shown their work, what awards they have won, and who has purchased their artwork. Keep informed of present and future exhibits. This hands on approach, connects you closely with affordable art that is available where you live and often created by artists who live in or near your area.
DISCOVER A RICH VISUAL WORLD
Art Appreciation is as big or small a study as you want to do. Whether you want to make it an occasional outing or a serious study, whatever you choose, learning how art forms have historically developed and understanding what is on the walls in your local gallery will definitely change your perspective.
Wouldn't it be great to be able to discuss a painting on the wall in a gallery, instead of shrugging and muttering, "I don't know much about art, but I know what I like."
Think of it. Perhaps your response would be more like, "I like the way this artist uses color in an Expressionistic style. The brushwork is so vigorous! There is a lot of energy in the composition. Also, the use of thick paint produces an interesting texture."
Through Art Appreciation you can discover a rich visual/creative world that will inspire you and beckon you to learn more.
Or, maybe you've gone to a gallery or art museum and your reactions was, "Wow! Great stuff! I like this! I don't know why, but I do!"
Or, maybe you've gone to a gallery or art museum, and, after viewing the exhibits, you walk away feeling bored and disinterested. You may have said to yourself, " Why do I bother with looking at art? I never understand it. It's beyond me."
Like any other discipline, art requires the viewer to be knowledgeable about the information it presents. Sometimes we think we should just automatically understand art. After all, there it is, just hanging there on the wall and all we have to do, we think, is just look at it. But do we really SEE it? Often, our response may be, "I don't know much about art, but I know what I like." That is just another way of saying, "What I like is really just based on my ignorance."
THE MORE YOU KNOW, THE MORE YOU CAN ENJOY
Liking a certain artwork is a pleasure. You have communicated with visual phenomena and really enjoyed the experience. It can be a very enriching, rewarding experience to know how and why an art form developed or have some knowledge of how and why an artist works in a particular way. More than likely, your perspective is quite limited if you have never studied art or know how it has developed in not only, our Western culture but all over the world. What if you could gain information on the many forms of art that have been produced since humanity began, and how it developed over time to the present day? What would this kind of study mean to you? It would mean that, equipped with that knowledge, you would be able to enjoy a lot more art!
Here's why.
The more you know about art and its development, the more you can enjoy looking at art! You will see much more and understand the context, content and style of the art form. And this is the basis of Art Appreciation-a study of how to expand your knowledge of the art world, past, present and future and, with that perspective, be able to communicate with the rich visual/creative world!
HOW TO BEGIN
So, how do your start gaining knowledge of this vast art world? Where do you begin?
Begin by dipping your toe into Art History. With a basic Art History 101 knowledge you will be able to see how art, as we know it, was not really a term until the science of Art History was developed in our western culture. And, when it was developed, as you can read in many art history books in the library, art has existed as long as humans have been able to pick up a stick, brush or chisel and record their lives and experiences.
There are several ways of learning how to appreciate art:
ONE -- Learn about the basics of art history. How art developed, from the Lascaux cave paintings to modern art today. Older art history books deal primarily with artistic development in Western culture. Newer books add developments in Asia, China, Russia and the mid-East. The study of Art History has, over time, become global. In learning the time lines and factors that produce new perspectives and styles in art, you will not only gain a new historical perspective, but also become acquainted with the various art forms produced over the past centuries.
TWO--Choose a certain period or style in art history and learn about it. Perhaps Impressionism interests you. Or maybe you've always wanted to know the difference between Op Art and Pop Art. Through studying the cultural impact of a certain style on a specific period in time, you can understand why that particular art form developed and appreciate the artwork in a broader context.
THREE--Take a tour of your local art museum. Museums offer a wide variety of art educational programs and tours of their exhibits. Or travel and see the actual art in its setting. There are many websites on the Internet listing global art tours and travel, often by geographical location or specific art and architectural styles. On site art tours offer a unique and interesting way to travel and can give you an intimate, one on one perspective with the historical art and culture of the area. Tour groups are generally small in number and conducted by very knowledgeable guides delighted to respond to all of your questions and comments.
FOUR-Visit your local art galleries often. Galleries are supportive of their artists and gallery owners and attendants are usually quite pleased at your interest in their exhibits. They will be glad to give you information on the artists, such as whether they are local, where they have shown their work, what awards they have won, and who has purchased their artwork. Keep informed of present and future exhibits. This hands on approach, connects you closely with affordable art that is available where you live and often created by artists who live in or near your area.
DISCOVER A RICH VISUAL WORLD
Art Appreciation is as big or small a study as you want to do. Whether you want to make it an occasional outing or a serious study, whatever you choose, learning how art forms have historically developed and understanding what is on the walls in your local gallery will definitely change your perspective.
Wouldn't it be great to be able to discuss a painting on the wall in a gallery, instead of shrugging and muttering, "I don't know much about art, but I know what I like."
Think of it. Perhaps your response would be more like, "I like the way this artist uses color in an Expressionistic style. The brushwork is so vigorous! There is a lot of energy in the composition. Also, the use of thick paint produces an interesting texture."
Through Art Appreciation you can discover a rich visual/creative world that will inspire you and beckon you to learn more.
Lois's website offering free online art classes and many art resources, includes a gallery of her own paintings and pastels, as well as her videos demonstrating a wide variety of skills and techniques in the lessons: http://www.free-online-art-classes.com
Article Source: http://EzineArticles.com/?expert=Lois_Dewitt
Monday, August 30, 2010
Pouring resin jewelry pendants
While I was getting ready to pour resin jewelry a couple of nights ago, I though I would grab a few pictures.

Resin always starts as two separate parts. When they're apart, they're completely inert. Once they are mixed together though, a chemical reaction starts and the mix eventually hardens. The cups at left show the measured resin.

Here I'm mixing the two parts together. It is important to wear gloves. I also use disposable cups and wooden toothpicks.

This shows my digital art affixed to the scrabble tiles. They are placed on a layer of wax paper in the case that some resin rolls off the pendants, it won't stick to any thing permanently.

For these pendants, I have to drop on the resin to each pendant individually with a toothpick. I have to work quickly as I only have about 15 minutes before the resin starts to get too firm to work with.
Once I have placed the resin on top of the jewelry, I cover it with a dome and allow it to harden. It takes approximately 3 days for the pieces to fully cure. Once they're done, I can adhere the bails to the back.

Resin always starts as two separate parts. When they're apart, they're completely inert. Once they are mixed together though, a chemical reaction starts and the mix eventually hardens. The cups at left show the measured resin.

Here I'm mixing the two parts together. It is important to wear gloves. I also use disposable cups and wooden toothpicks.

This shows my digital art affixed to the scrabble tiles. They are placed on a layer of wax paper in the case that some resin rolls off the pendants, it won't stick to any thing permanently.

For these pendants, I have to drop on the resin to each pendant individually with a toothpick. I have to work quickly as I only have about 15 minutes before the resin starts to get too firm to work with.
Once I have placed the resin on top of the jewelry, I cover it with a dome and allow it to harden. It takes approximately 3 days for the pieces to fully cure. Once they're done, I can adhere the bails to the back.
Friday, August 27, 2010
The view from my art jewelry office
 So I thought it might be fun to show you what my office looks like. My office is a separate room inside my house. I would one day LOVE for it to be in my studio, but alas...another day. I'm not a neat freak by any stretch of the imagination. I use a lot of "piles" to organize, but am slowly switching over to using file folders and organizing racks. Perhaps I can get some help in this someday. This is my computer desk complete with laser printer to the left. I use the printer to print out the images for some of my resin pieces. The laser printer was so much more expensive, but I am so much happier with the print quality.
I've had to expand to buy a couple of shelving units to store jewelry making materials. Before making resin jewelry, I always kept everything I could in my art studio. Since resin can be a bit fussy about the weather, I keep a lot of those materials indoors. The picture at left shows a hodge podge of papers and materials. If you look closely at the 4th shelf down on the right, I've actually got resin jewelry pieces curing under the plastic container "domes".

This shelving unit contains gift boxes and packaging materials. You can see the 3rd and 4th shelves down contain packing envelopes and boxes complete with a postal scale.

A closeup of some of the scrabble tile pendants in process.

More digital art papers waiting to be applied to scrabble tiles. I keep them inside as well since I can keep the dust down in my office better than in my studio.
I promise one of these days to get my studio cleaned up enough for a tour there as well. *smile*
Wednesday, August 25, 2010
Pictures of my local bead shop

They always have a large rack of books available for purchase. The latest beading magazines are usually there too.

There is a HUGE selection of beads! Shoppers can purchase them as singles, strung, or as "hanks".

The glass counter here has the class examples for the upcoming months. I'm not the only who teaches jewelry making there. There are several other local jewelry artists who teach bead weaving, glass fusing and other metalsmithing techniques.

Gifts of Avalon also has a nice selection of semi precious stone beads. There is a nice assortment of colors, shapes and sizes.

A closeup of of some turquoise, sugilite, jasper and coral beads.

How can you make beaded jewelry without metal findings? Trick question! This is a picture of some of the large trays of copper and bronze beads. There are sterling silver beads for sale as well.

Sometimes store owners, Trude Spillane and Rhonda Bergman, buy beads in bulk. They will repackage them into smaller containers for sale at a bargain price.
Currently, Gifts of Avalon does sell beads and jewelry making items on their website. There store has a lot of inventory, so I would even recommend you to call if you don't find what you're looking for on their jewelry store site.
Does this look anything like your favorite bead shop?
Monday, August 23, 2010
Metal jewelry making class examples
 I teach a jewelry making class at Gifts of Avalon, Gainesville, Florida, once monthly. My students are always pushing me to come up with new class ideas. For my class on October 4, I am showing students how to create a crimped pattern in both metal sheet and wire. The class examples are shown here.

I teach students how to use the equipment we need for the project. The store generally offers a discount to equipment purchases made on the day of the class.

I teach classes that don't require a torch. There is so much to jewelry making that students can do without needing to use heat.

I also like to teach short, evening classes. I think students have the best attention span that way and tend to get less frustrated.

Is there something you would like to see me teach? I'm always open for suggestions.
Friday, August 20, 2010
Questions to ask at an art show
As I'm busy preparing for the fall art shows, I am also keeping in mind what customers have wanted in the past or could potentially have a need for. There's more to selling jewelry than just selling the jewelry! One thing I try hard to do is to answer questions from art enthusiasts and take the opportunity to educate them about my artisan jewelry. It actually got me thinking about questions I WISH people would ask. I certainly don't want to overload people with information about my resin jewelry if they don't want to hear it, but I do love to talk about what I do. I brainstormed a few questions that I believe someone could ask any artist at an art show or gallery opening and hopefully get some thoughtful responses.

Along the line of what to ask, I would like to share with art enthusiasts one question not to ask: "Did you make this?" I realize that may seem like a perfectly innocent question on a shopper's part, but it's one that artists are asked MULTIPLE times during an art show or opening. Artists tend to take that question as "Of course! As opposed to my little gnomes or slave labor?" A better question would be, "Are you the artist?" if you are unsure if the person you are talking to actually created the art. (Just a suggestion to get the conversation off to a good start.)
There are certainly others that I get asked that I'm happy to answer as well. What other questions would you like to add to this list?

- What inspires you?
- What is your technique?
- How is your art different from other artists?
- How did you get started?
- Can you take me step by step through a piece?
- Why do you do your art?
- Why do you do this particular kind of art (or use this particular technique)?
- Can you describe your creative process?
Along the line of what to ask, I would like to share with art enthusiasts one question not to ask: "Did you make this?" I realize that may seem like a perfectly innocent question on a shopper's part, but it's one that artists are asked MULTIPLE times during an art show or opening. Artists tend to take that question as "Of course! As opposed to my little gnomes or slave labor?" A better question would be, "Are you the artist?" if you are unsure if the person you are talking to actually created the art. (Just a suggestion to get the conversation off to a good start.)
There are certainly others that I get asked that I'm happy to answer as well. What other questions would you like to add to this list?
Wednesday, August 18, 2010
My visit with a local painter
I spent the afternoon recently with Florida landscape artist Linda Blondheim. Linda and I get together every 6 months or so to talk the business of art. It's nice to be able to compare notes with someone that's not in my media. We can discuss what's working and what's not working. At the end, we always have an actionable plan to work on. We'll report back to each other in a few months to see how our plan is going.
 I met Linda at her studio which is about 10 miles north of Gainesville. I fully admit that I have studio envy! Linda's art studio is the perfect place for her to paint. What I love about it is that her art studio is a separate, climate controlled, quaint building that she can completely call her own. I long for the day that I can have a studio that's not part of my house and that I don't have to worry about little people inadvertently destroying something! I took some pictures from my visit to share just what Linda's painting life is like. You can see here at the easel she has a work in progress. Linda blogs about her paintings and how she artistically works through them.

Her supplies are always organized and make sense. You can see here how her brushes and paints are within easy reach of her easel.

I wandered around her studio grabbing pictures of her latest Florida landscape oil paintings. I love how she is so exact with her interpretations. As she explained to me, "I like people to experience a 'vacation', at least for a few moments, when they view my paintings."

Linda is taking notes about our conversation while I grab some pictures.

Linda is ALWAYS the best hostess. I have never been to her studio without being treated like a special guest. This day was no different. A lovely plate of tea sandwiches and fruit awaited me. She joyfully recalled how this was a part of her southern hospitality upbringing.

Linda always has a selection of paintings tastefully framed and ready for hanging. I'm always impressed that she carefully considers the frame before putting the oil painting in it.
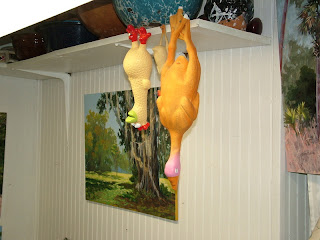
These rubber chickens grace her studio as well. I'll let her tell you how they got there. *smile*

Linda does several paint outs during the year along with painting on location. I think that closeness translates into her landscape paintings.

I just couldn't stop taking pictures! (and I certainly couldn't choose only one or two to post)

Linda also receives visitors to her studio. She is very gracious and enjoys the time to connect.

This is me and Henry, Linda's studio dog. Henry is a French Bulldog and is always happy to visit as well. He is quite lively and Linda is aware that I like visiting with Henry as much as I do with her. He accompanies her on trips and has even made a paint out or two. Not much gets past him!
I look forward to my next visit!


Her supplies are always organized and make sense. You can see here how her brushes and paints are within easy reach of her easel.

I wandered around her studio grabbing pictures of her latest Florida landscape oil paintings. I love how she is so exact with her interpretations. As she explained to me, "I like people to experience a 'vacation', at least for a few moments, when they view my paintings."

Linda is taking notes about our conversation while I grab some pictures.

Linda is ALWAYS the best hostess. I have never been to her studio without being treated like a special guest. This day was no different. A lovely plate of tea sandwiches and fruit awaited me. She joyfully recalled how this was a part of her southern hospitality upbringing.

Linda always has a selection of paintings tastefully framed and ready for hanging. I'm always impressed that she carefully considers the frame before putting the oil painting in it.

These rubber chickens grace her studio as well. I'll let her tell you how they got there. *smile*

Linda does several paint outs during the year along with painting on location. I think that closeness translates into her landscape paintings.

I just couldn't stop taking pictures! (and I certainly couldn't choose only one or two to post)

Linda also receives visitors to her studio. She is very gracious and enjoys the time to connect.

This is me and Henry, Linda's studio dog. Henry is a French Bulldog and is always happy to visit as well. He is quite lively and Linda is aware that I like visiting with Henry as much as I do with her. He accompanies her on trips and has even made a paint out or two. Not much gets past him!
I look forward to my next visit!
Monday, August 16, 2010
A day in the life of an art jewelry maker
 I don't really know how typical my day is compared to other people. I'm sure for moms out there that are trying to balance a career and family life, much of what I say here will sound familiar. I get questions form art enthusiasts and patrons just how I manage to get done what I do. Here is my typical day:
Up between 5 AM and 6 AM. With any luck, my kids aren't up yet. If I manage to get to bed at a decent hour the night before, it's closer to 5 AM. My list of things to get done in the morning before 7 AM is:
- Read and respond to emails
- Read my google alerts
- Read the blogs I follow
- Package orders and prepare them for mailing (to hand to hubby to mail on his way to work)
- Post updates and make changes to my jewelry gallery website, KMS Designs
- Write blog posts for this blog and my other jewelry blog, Handmade Resin Jewelry
- Use Hoot Suite to get my tweets ready for the day. (I like to tweet live, but when I find good articles, I like to schedule them to go out all during the day instead of one big lump.)
- Seal papers for resin
- Photograph jewelry (weather permitting)
- Upload new pictures to my Facebook and Flickr pages.
- Prepare metal pieces and settings to have resin included in them later
After my kids are in bed (about 9 PM or so during the summer), I get back to work. I'm up until 10 PM or possibly as late as midnight. The later I go to bed, the later I start the next morning (although it's not really sleeping in...)
- Pour resin
- Sand, polish and drill resin pieces as needed
- Assemble finished resin jewelry components
- Make website and blog updates
So for all you moms out there, how else do you balance work and family life?
Friday, August 13, 2010
Grilling pizza

Dinner at my house gets to be a battle between gourmet and something 3 small children will eat. One menu choice we all can agree on is a grilled pizza and a salad (at least for me anyway).
My husband also prefers his pizza this way. I thought I would share how I like to grill a pizza. (Not an exact science, but you'll get the idea.)
Get some pizza dough. I suppose you could make your own, but I just get a ball of it from my neighborhood grocery. I like to let it sit out all day if I can. It rises much better.
Spread it out into a pizza crust shape. I usually end up pulling on the dough and letting it hang from my hands to stretch it out.

Preheat your grill on high for at least 5 minutes. Once this is done, put the pizza dough on and turn it to low. After about 3 to 4 minutes, flip the dough over with BBQ tongs. It should flip over firmly. If it still wants to "stretch", it needs a little more time.
I brush the freshly grilled side with olive oil and a couple of cloves of crushed garlic. Then, I add an assortment of cheeses, usually white cheeses like parm, mozzarella and asiago. I let the cheese melt about 3 minutes, then I add on my other toppings. This night, I just did some roma tomatoes. I let the pizza grill another 3 to 4 minutes.
Pull off your pizza (you can check the underside to see if it's done) and add fresh herbs to your liking. We're not red sauce fans in this house, but I serve it on the side for dipping if anyone wants it.
I usually do this recipe in this house a couple of times a month. Enjoy!
Wednesday, August 11, 2010
Scrabble tile jewelry in progress

I have been concentrating on the Scrabble tile pendants over the last couple of weeks. The early comments from my customers and wholesale accounts have been positive, so I have been focusing on them.

As I was working on them yesterday, I loved how the random assortment of them on my tray looked like art itself. I've been having fun working with different colors, patterns and simulated textures.

This is just a preview of what's to come! Stay tuned.
Monday, August 09, 2010
Making resin jewelry bracelets, Part 7
(Read part 1, part 2, part 3, part 4, part 5, and part 6 of the resin jewelry making process)
Now that I've got the individual pieces sanded and drilled, it's time to assemble and polish the pieces.

These are the bracelet links I'm going to use. It's just a random, complimentary assortment of the links.

I line them up in the order that I like. For the most part, it's random, but I try to make sure I don't have all the same paper patterns next to each other. I try to mix it up.

I thread my stretch plastic cord through the holes. Remember how I was being so particular about making sure the drilled holes were free of shavings? This is why. I can't thread the plastic through if anything is in the way.

I have the first set of holes threaded. Now I go back and do the second set.

Once I have the cord strung through both sides, I tie a square knot into each piece.

After trimming the ends of the cord, I give the bracelet one last good shine with some wax.

This is it! Can you believe it's finally done?
So here's the question I need answered from fans and visitors:
After seeing the posts on how to make this bracelet and seeing the finished resin bracelet above, what would you expect to pay for a piece of art jewelry like this?
Now that I've got the individual pieces sanded and drilled, it's time to assemble and polish the pieces.

These are the bracelet links I'm going to use. It's just a random, complimentary assortment of the links.

I line them up in the order that I like. For the most part, it's random, but I try to make sure I don't have all the same paper patterns next to each other. I try to mix it up.

I thread my stretch plastic cord through the holes. Remember how I was being so particular about making sure the drilled holes were free of shavings? This is why. I can't thread the plastic through if anything is in the way.

I have the first set of holes threaded. Now I go back and do the second set.

Once I have the cord strung through both sides, I tie a square knot into each piece.

After trimming the ends of the cord, I give the bracelet one last good shine with some wax.

This is it! Can you believe it's finally done?
So here's the question I need answered from fans and visitors:
After seeing the posts on how to make this bracelet and seeing the finished resin bracelet above, what would you expect to pay for a piece of art jewelry like this?
Subscribe to:
Posts (Atom)
